Tag: crochet pattern

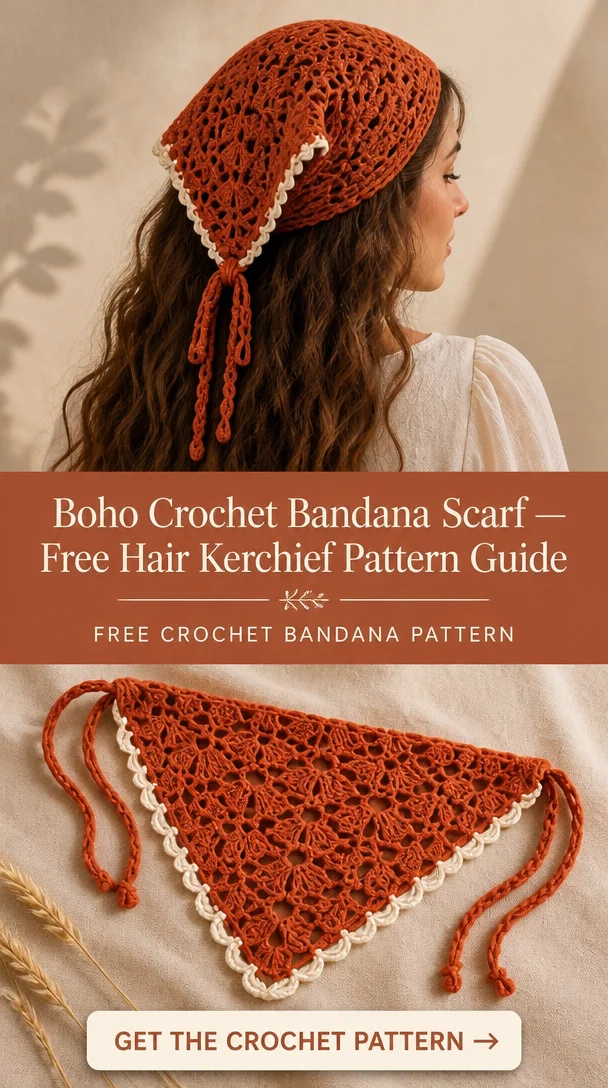
  • Boho Crochet Bandana Scarf — Free Hair Kerchief Pattern Guide

    Boho Crochet Bandana Scarf — Free Hair Kerchief Pattern Guide

    Boho Crochet Bandana Scarf — Free Hair Kerchief Pattern Guide

    The Boho Crochet Bandana Scarf is a charming and versatile accessory that effortlessly combines style with functionality. Designed with a trendy bohemian flair, this triangle-shaped bandana is perfect for adding a touch of personality to any outfit. Its unique texture and pattern make it not only a fashion statement but also a practical hair accessory for warmer months. Whether you’re heading to a summer festival, a beach day, or simply running errands, this crochet bandana can be styled in various ways to elevate your look. Perfect for crocheters of all skill levels, this free pattern allows you to express your creativity while crafting a delightful handmade piece.

    Crochet Bandana Pattern Overview

    • Skill Level: Beginner to Intermediate
    • Finished Dimensions: Approximately 20 inches wide and 10 inches from top to point
    • Crochet Hook Size: H/8 (5mm)
    • Yarn Type: Cotton or acrylic blend
    • Yarn Weight: Worsted weight
    • Main Colors: Your choice (suggested colors for a boho feel)
    • Stitch Pattern: Basic stitches with optional decorative elements
    • Construction Method: Triangle construction
    • Approximate Completion Time: 2-4 hours
    • Granny Squares: Not used in this pattern

    Materials You’ll Need

    • Yarn (worsted weight)
    • Crochet hook (H/8 or 5mm)
    • Yarn needle for weaving in ends
    • Stitch markers
    • Scissors
    • Measuring tape
    • Optional: beads or decorative elements for embellishment

    Crochet Abbreviations

    • ch = chain
    • sc = single crochet
    • dc = double crochet
    • sl st = slip stitch
    • st = stitch
    • sp = space
    • rep = repeat

    Before You Start

    Before diving into the crochet bandana pattern, take the time to understand the stitch repeat and familiarize yourself with the pattern’s layout. Maintaining an even tension throughout your work will help achieve a symmetrical shape. Checking your gauge may be helpful, especially if you prefer a specific size, and always remember to read the pattern carefully, ensuring you follow each row as instructed.

    Free Crochet Bandana Pattern

    Starting Chain or Foundation

    Chain 40 (or your desired width).

    First Row

    Row 1: Sc in the second ch from the hook, then sc across (total of 39 sc).

    Building the Triangle

    Row 2: Ch 2, turn, and dc in the first st. Continue dc across until the end (total of 39 dc).

    Increasing Rows

    Row 3: Ch 2, turn, and make 2 dc in the first st, then continue with dc to the last st. Make 2 dc in the last st.

    Row 4: Repeat Row 3.

    Decorative Border

    To create a border, work a row of sc around the triangle, making 3 sc in each corner for a smooth curve.

    Crochet Bandana Edging and Finishing Details

    Finish off the bandana by weaving in all loose ends with a yarn needle. You may also choose to add a decorative edge using slip stitches or a series of scallops to enhance the bohemian look.

    How to Wear and Style Your Crochet Bandana

    This crochet bandana can be styled in various ways:

    • Classic Headscarf: Tie it at the back of your head for a vintage look.
    • Boho-Inspired Outfit: Wear it as a headband with loose hair for a carefree vibe.
    • Summer Accessory: Keep your hair off your face during hot days.
    • Casual Everyday Wear: Pair it with denim or sundresses for a relaxed style.
    • Festive Styling: Perfect for outdoor events or music festivals.
    • Handmade Gift: A wonderful gift for friends and family.

    Tips for a Better Result

    • Keep your tension consistent throughout to maintain shape.
    • Ensure your edges are even by counting stitches.
    • Work neat color changes, if you choose to incorporate multiple tones.
    • Take your time to make clean joins if working with slip stitches or embellishments.

    Crochet Bandana Customization Ideas

    Consider customizing your bandana with:

    • Different color combinations to match your wardrobe.
    • Contrasting borders for added flair.
    • Using cotton yarn for a lighter summer feel.
    • Making longer or shorter ties depending on your preference.

    Common Problems and Troubleshooting

    If you encounter issues while crocheting, consider these troubleshooting tips:

    • Uneven triangle shapes may result from inconsistent tension; adjust your technique.
    • Curling edges can be minimized by ensuring you have the correct stitch count.
    • If your bandana is too wide, try reducing the number of starting chains next time.

    Care and Maintenance

    To maintain your handmade crochet bandana:

    • Hand wash and lay flat to dry according to the yarn manufacturer’s instructions.
    • Avoid wringing out your piece to preserve its shape.
    • Store it away from direct sunlight to keep colors vibrant.

    Frequently Asked Questions

    • Is this crochet bandana pattern beginner-friendly?
      Yes, the pattern is suitable for beginners with basic crochet knowledge.

    • What yarn is best for a crochet bandana?
      A worsted weight cotton or acrylic blend is ideal for durability and comfort.

    • How long does it take to crochet a bandana?
      Approximately 2-4 hours, depending on your experience level.

    • Can I make this crochet bandana larger or smaller?
      Yes, you can adjust the starting chain to modify size.

    • How do I keep the triangular shape even?
      Maintain consistent tension and carefully follow the increasing rows.

    • Can I use different yarn colors?
      Absolutely! Customizing colors adds a personal touch.

    • How do I make the crochet bandana ties?
      Simply chain as long as desired for ties at the back of the bandana.

    • Can I wear this bandana in summer?
      Definitely! It’s a perfect summer hair accessory.

    Conclusion

    The Boho Crochet Bandana Scarf is an exciting and rewarding project that adds a stylish element to your wardrobe. With its easy-to-follow pattern and diverse styling options, you’ll enjoy creating and wearing this lovely handmade accessory. Grab your materials and start crocheting your own boho bandana today!


    SEO Title: Free Boho Crochet Bandana Scarf Pattern Guide

    Meta Description: Discover how to create a stylish Boho Crochet Bandana Scarf with this easy, free hair kerchief pattern, perfect for summer outfits!

    URL Slug: boho-crochet-bandana-pattern

    Primary Keyword: crochet bandana pattern

    Secondary Keywords: free crochet bandana pattern, easy crochet bandana, handmade crochet headscarf, crochet hair scarf, triangle crochet bandana

    Image 1 Alt Text: Boho crochet bandana scarf displayed on a wooden table

    Image 2 Alt Text: Close-up of the crochet stitches on the bandana scarf

  • Ziggy’s Bandana Free Crochet Pattern

    Ziggy’s Bandana Free Crochet Pattern

    Ziggy’s Bandana Free Crochet Pattern

    Discover the joy of crocheting with Ziggy’s Bandana, a unique and stylish crochet bandana that transcends traditional headscarf designs. This lightweight piece features a stunning diamond-shaped mesh pattern, creating a visually appealing texture while providing versatility in styling. It’s perfect for accessorizing in a myriad of ways—use it as a chic hair accessory, a stylish waist tie, or even as a decorative addition to your favorite bags. Choose your preferred yarn color to make this accessory uniquely yours. Whether you’re an experienced crocheter or a beginner exploring new techniques, this pattern is designed to inspire creativity and enhance your summer wardrobe.

    Crochet Bandana Pattern Overview

    • Skill Level: Easy
    • Finished Dimensions: Adjustable based on ties
    • Crochet Hook Size: 4.0 mm (G)
    • Yarn Type: Cotton or cotton blend
    • Yarn Weight: DK/Light Worsted
    • Main Colors: Any preferred color
    • Stitch Pattern: Diamond mesh
    • Construction Method: Triangular, works in rows
    • Approximate Completion Time: 1-2 hours
    • Project Suitability: Beginner-friendly

    Materials You’ll Need

    • Yarn (Cotton or cotton blend)
    • Crochet hook (4.0 mm / G)
    • Yarn needle
    • Stitch markers
    • Scissors
    • Measuring tape

    Crochet Abbreviations

    • ch = chain
    • sc = single crochet
    • dc = double crochet
    • sl st = slip stitch
    • st = stitch
    • sp = space
    • rep = repeat

    Before You Start

    Before diving into the project, familiarize yourself with the diamond mesh stitch used throughout the bandana. Maintaining an even tension is crucial for the finished shape and appearance. Plan your color changes if you’d like to incorporate multiple shades, and ensure you have a good grasp of how to increase stitches to shape the triangle.

    Free Crochet Bandana Pattern

    Starting Chain

    Begin with a foundation chain of approximately 30 chains.

    First Row

    Row 1: In the 4th chain from the hook, dc, skip one chain, and dc in the next chain. Repeat across the row until reaching the last chain.

    Building the Triangle

    Row 2: Turn your work, ch 3. In the first sp, dc, followed by ch 1, and dc in the next sp. Repeat across to the end.

    Increasing Rows

    Continue with increasing rows:

    1. Start each row with a ch 3
    2. For each subsequent row, include additional dcs in the outer edges to produce the triangular shape.

    (Additional detailed stitch count and methods should follow as per your expertise.)

    Bandana Construction and Assembly

    Once the desired triangle size is reached, you can easily manipulate the edges to create a rounded or pointed finish. Block your work if necessary for better shape retention.

    Crochet Bandana Edging and Finishing Details

    Finish your bandana by adding a decorative border of dc or a simple scalloped edge around the outer layer to enhance its charm.

    How to Wear and Style Your Crochet Bandana

    Ziggy’s Bandana is not just a headscarf! Here are several styling ideas:

    • Classic Headscarf: Tie it around your head for a vintage look.
    • Casual Accessory: Wear it as a neck scarf for a pop of color.
    • Boho Style: Use it as a bag charm or waist accessory for a festival vibe.
    • Gift Idea: Make it a thoughtful handmade gift for friends and family.

    Tips for a Better Result

    • Maintain consistent tension to keep the triangle shape intact.
    • Pay attention to your stitch count to avoid uneven edges.
    • Use a stitch marker to keep track of repeat sections.

    Crochet Bandana Customization Ideas

    Make your bandana personal with the following modifications:

    • Experiment with different yarn colors or stripes.
    • Use contrasting colors for the borders for added flair.
    • Adjust the size by changing the initial chain length and stitch counts.

    Common Problems and Troubleshooting

    If you encounter issues while crocheting, here are common problems:

    • Uneven triangle shape: Check your tension and stitch counts.
    • Curling edges: Block your finished bandana to shape it properly.
    • Ties are uneven: Ensure even stitch counts on both sides.

    Care and Maintenance

    To preserve the beauty of your bandana, follow the yarn manufacturer’s washing instructions. Always wash gently to prevent stretching or distorting the stitches, and lay flat to dry.

    Frequently Asked Questions

    • Is this crochet bandana pattern beginner-friendly?
      Yes, this pattern is designed with simplicity in mind, making it easy for both beginners and experienced crocheters.

    • What yarn is best for a crochet bandana?
      A lightweight cotton or cotton blend works best for a soft and breathable bandana.

    • How long does it take to crochet a bandana?
      You can complete this bandana in roughly 1-2 hours, depending on your skill level.

    • Can I make this crochet bandana larger or smaller?
      Yes! You can adjust the starting chain length to change the size of the bandana to fit your personal preferences.

    • How do I keep the triangular shape even?
      Focus on maintaining consistent tension and double-check your stitch counts as you work.

    Conclusion

    With Ziggy’s Bandana, you not only create a beautiful accessory but also embrace a trend that’s filled with versatility. Whether you’re wearing it as a headscarf, a waist tie, or a bag embellishment, this easy crochet bandana pattern brings both style and creativity to your summer outfits. Grab your yarn and hook, and enjoy making this delightful piece for yourself or a loved one!


    SEO Title: Free Crochet Bandana Pattern – Ziggy’s Stylish Bandana
    Meta Description: Create Ziggy’s Bandana with this free crochet pattern. Perfect as a headscarf or summer accessory, it’s easy to customize and fun to wear!
    URL Slug: ziggy-bandana-free-crochet-pattern
    Primary Keyword: Ziggy’s Bandana Free Crochet Pattern
    Secondary Keywords: crochet bandana pattern, easy crochet bandana, crochet headscarf pattern, handmade crochet headscarf, summer crochet bandana
    Image 1 Alt Text: Crocheted Ziggy Bandana in Light Blue
    Image 2 Alt Text: Model wearing Ziggy Bandana as a chic hair accessory

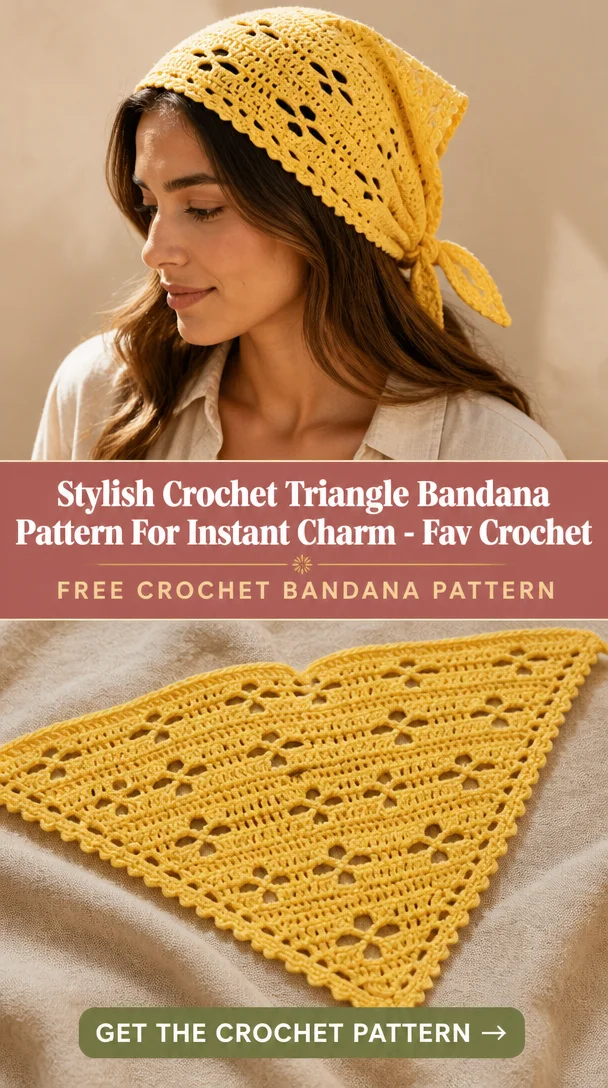
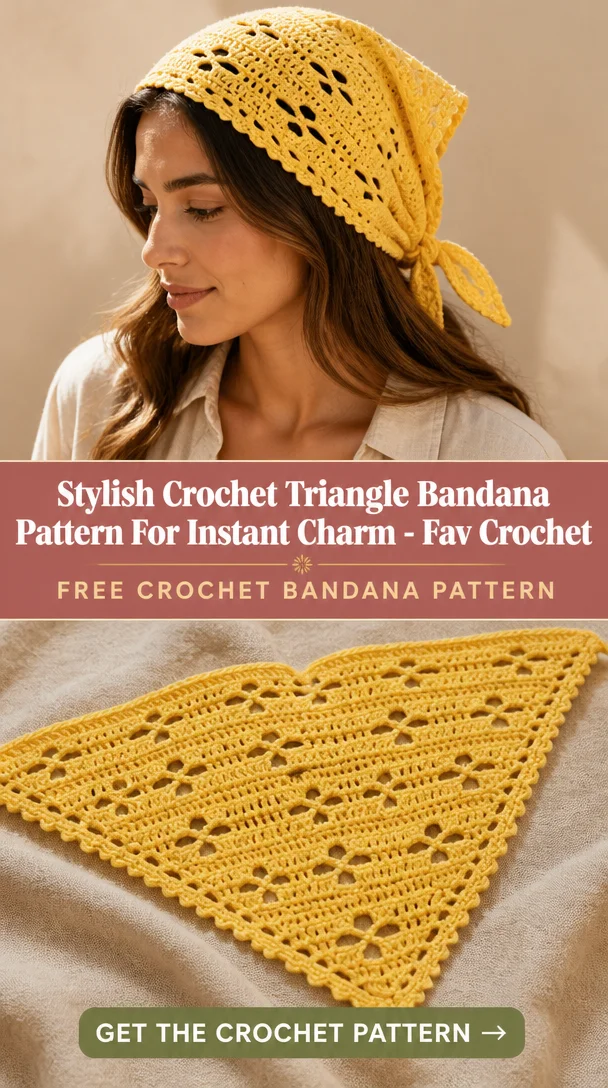
  • Stylish Crochet Triangle Bandana Pattern For Instant Charm – Fav Crochet

    Stylish Crochet Triangle Bandana Pattern For Instant Charm – Fav Crochet

    Stylish Crochet Triangle Bandana Pattern For Instant Charm – Fav Crochet

    Are you ready to add a touch of charm to your outfits this summer? This stylish crochet triangle bandana pattern is not just a delightful accessory; it’s a versatile piece that will elevate your look effortlessly. Designed to be simple yet chic, this crochet bandana can be worn as a trendy headscarf or an elegant hair accessory, making it perfect for various occasions. Whether you’re lounging by the beach or attending a weekend festival, this handmade piece will definitely turn heads. Suitable for both beginners and experienced crocheters, this pattern invites you to unleash your creativity and make something truly special.

    Stylish Crochet Triangle Bandana Pattern For Instant Charm - Fav Crochet

    Crochet Bandana Pattern Overview

    • Skill Level: Beginner-friendly
    • Finished Dimensions: Adjustable based on styling
    • Crochet Hook Size: Recommended size not specified
    • Yarn Type: Cotton or cotton blend
    • Yarn Weight: Worsted
    • Main Colors: Your choice!
    • Stitch Pattern: Basic stitches and granny squares
    • Construction Method: Triangular shape with potential granny square motifs
    • Approximate Completion Time: 2-3 hours
    • Techniques Used: Triangle increases and basic construction

    Materials You’ll Need

    • Yarn (cotton or cotton blend)
    • Crochet hook (size depending on the yarn)
    • Yarn needle
    • Stitch markers
    • Scissors
    • Measuring tape
    • Optional: Decorative elements like beads or tassels

    Crochet Abbreviations

    • ch = chain
    • sc = single crochet
    • hdc = half double crochet
    • dc = double crochet
    • sl st = slip stitch
    • st = stitch
    • sp = space
    • rep = repeat

    Before You Start

    Before you dive into this crochet bandana pattern, it’s important to understand a few key aspects that will help you achieve the best results:

    • Understanding the Stitch Repeat: Familiarize yourself with the basic stitch patterns and how they repeat.
    • Maintaining Even Yarn Tension: Keeping your stitches even ensures a symmetrical triangle shape.
    • Triangle Increases: Pay close attention to the increasing rows to maintain the proper form of the bandana.
    • Planning Color Changes: If you wish to use multiple colors, think about how and when you’ll switch yarns.

    Free Crochet Bandana Pattern

    Starting Chain or Foundation

    Row 1: Start with a slip knot and chain the desired width for the base of your triangle.

    First Row

    Row 1: Work your preferred stitch across the chain (e.g., single or double crochet), keeping the tension even.

    Building the Triangle

    Row 2: Continue to increase by working double crochet stitches at the beginning and end of each row.

    Increasing Rows

    Row 3 – 10: Continue increasing until the triangle reaches your desired height.

    Granny Square Motifs

    If you wish to add granny square motifs, follow this section:

    • Create a small granny square using the standard 3-round method.
    • Make as many squares as you desire for decoration.

    Joining Granny Squares

    • Use slip stitches or single crochet to join the squares to the main triangle, placing them strategically for aesthetic appeal.

    Decorative Border

    Row 1: Add a border around the entirety of the bandana using a simple double crochet or single crochet border.

    Scalloped Edging

    Row 2: Work a scalloped edging by creating a series of chain stitches followed by single crochet into the same stitch.

    Crochet Ties

    • Chain the desired length for the ties, ensuring they are long enough to secure the bandana comfortably.

    Finishing the Bandana

    • Weave in all yarn ends using a yarn needle and block the finished piece if necessary.

    Bandana Construction and Assembly

    The crochet bandana is constructed by first building a triangular shape through consistent increases. If incorporating granny squares, be sure to align them neatly as you attach them to the triangle. Once assembled, add ties for easy wear, and finish edges with a decorative border for a polished look.

    Crochet Bandana Edging and Finishing Details

    Complete the bandana with a decorative edging of your choice to enhance its visual appeal. You can create a scalloped border or choose a simple and clean finish with single crochet. Be sure to secure all loose ends and consider blocking the piece for a final polished appearance.

    How to Wear and Style Your Crochet Bandana

    This crochet bandana can be styled in several ways:

    • Classic Headscarf: Perfect for everyday wear or adding flair to a casual outfit.
    • Summer Hair Accessory: Great for keeping hair in place during hot weather.
    • Boho-Inspired Outfit: Pair with flowing dresses for a bohemian look.
    • Casual Everyday Accessory: Suitable for a laid-back, chic aesthetic.
    • Beach or Festival Style: Adds a unique touch to summer outfits and festival attire.

    Tips for a Better Result

    • Maintain consistent tension for even triangles.
    • Use stitch markers to keep track of your increases.
    • Check your work regularly to prevent uneven edges.
    • Make clean color changes for aesthetic appeal.
    • Ensure that ties are even in length.

    Crochet Bandana Customization Ideas

    Make this bandana truly your own by experimenting with:

    • Different yarn colors to suit your style.
    • Adding contrasting borders for a pop of color.
    • Making longer or shorter ties for personalized comfort.
    • Incorporating decorative edging to suit the occasion.

    Common Problems and Troubleshooting

    • Uneven Triangle Shape: Check your tension and stitch count.
    • Incorrect Stitch Counts: Double-check instructions for accurate counting.
    • Edges Curling: Block your finished piece for a flat look.
    • Granny Squares Not Aligning: Reassess your joining technique.

    Care and Maintenance

    To maintain the beauty of your crochet bandana, follow the yarn manufacturer’s care instructions. Hand washing is generally advisable for delicate stitches, and air drying will help retain the bandana’s shape.

    Frequently Asked Questions

    • Is this crochet bandana pattern beginner-friendly? Yes, it’s designed with beginners in mind.
    • What yarn is best for a crochet bandana? Cotton or cotton blends work wonderfully.
    • How long does it take to crochet a bandana? Expect to spend around 2-3 hours on this project.
    • Can I make this crochet bandana larger or smaller? Yes, you can adjust the starting chain and stitch count accordingly.
    • How do I keep the triangular shape even? Regularly check your stitch counts and tension during the project.
    • Can I use different yarn colors? Absolutely! This pattern welcomes creative color choices.
    • How do I make the crochet bandana ties? Simple chains or braids can be used for the ties for secure fastening.
    • Can I wear this bandana in summer? Yes, it’s lightweight and perfect for summer styling!

    Conclusion

    This stylish crochet triangle bandana is not just an accessory; it’s a statement piece that you can effortlessly integrate into your wardrobe. With its simple yet charming design, you’ll love personalizing this project while enjoying the crafting process. Start crocheting today and don’t hesitate to get creative!


    SEO Title: Stylish Crochet Triangle Bandana for Instant Charm
    Meta Description: Enhance your summer style with this easy-to-make crochet triangle bandana. Perfect for any outfit and great for beginners!
    URL Slug: crochet-bandana-pattern
    Primary Keyword: crochet bandana pattern
    Secondary Keywords: crochet bandana, easy crochet bandana, triangle crochet bandana, handmade crochet headscarf, crochet bandana tutorial

    Image 1 Alt Text: Completed crochet triangle bandana displayed on a mannequin.
    Image 2 Alt Text: Close-up of the crochet bandana featuring granny squares and scalloped edging.

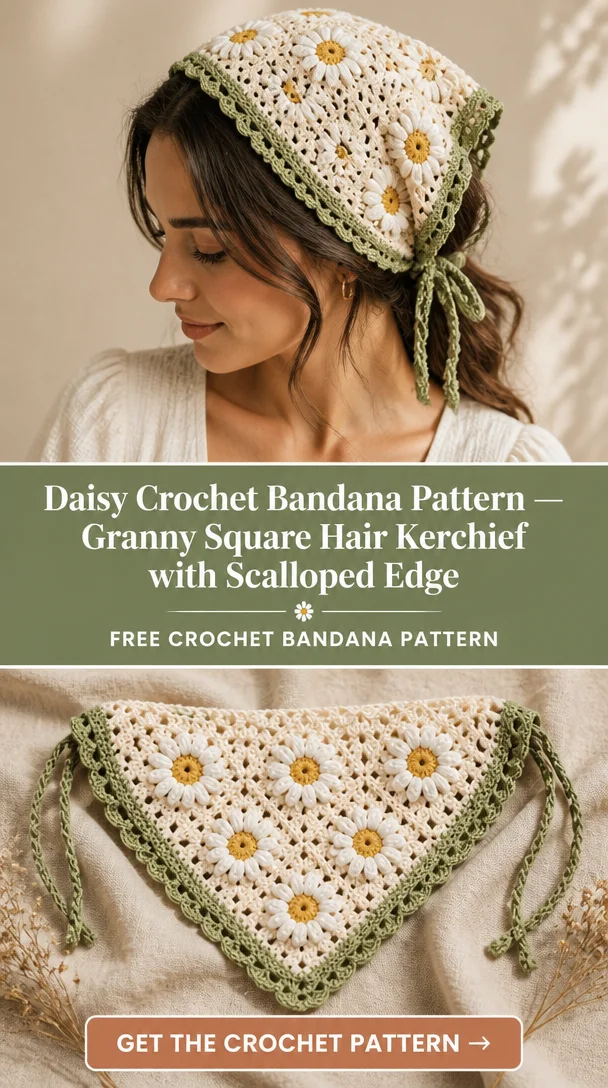
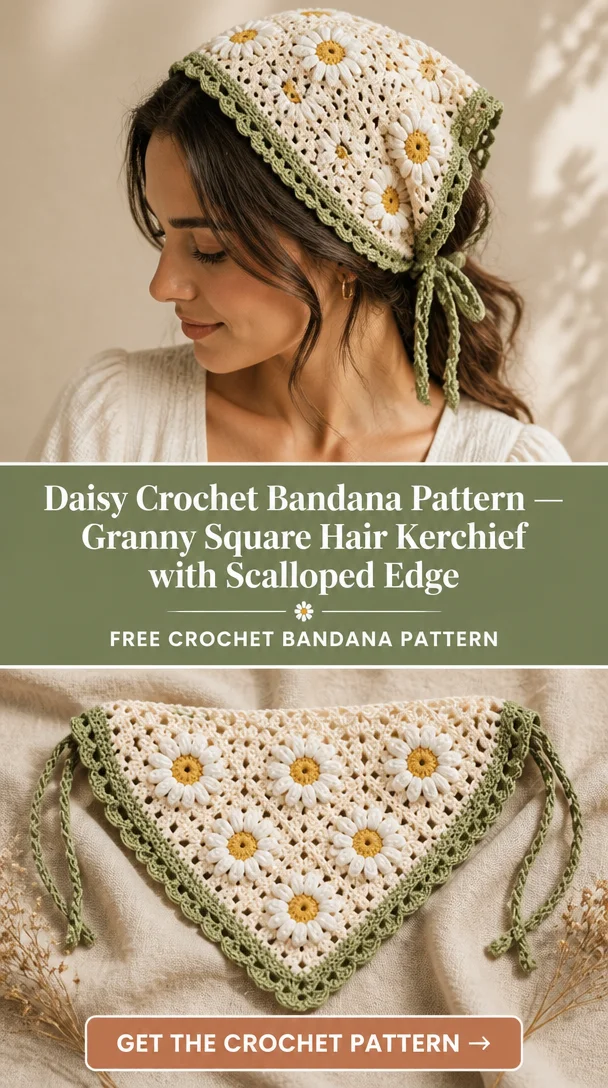
  • Daisy Crochet Bandana Pattern — Granny Square Hair Kerchief with Scalloped Edge

    Daisy Crochet Bandana Pattern — Granny Square Hair Kerchief with Scalloped Edge

    Daisy Crochet Bandana Pattern — Granny Square Hair Kerchief with Scalloped Edge

    The Daisy Crochet Bandana is a delightful addition to any summer wardrobe, blending style and functionality into a charming hair accessory. Crafted from puff-flower granny squares, this head kerchief features an enchanting scalloped sage border that elevates its overall aesthetic. Perfect for those looking to channel their cottagecore vibes, this crochet bandana not only offers a unique style but also provides versatility in how it can be worn. Whether you’re at the beach, a festival, or simply out and about, this handmade hair accessory will surely complement your outfit beautifully. Suitable for crocheters with some experience, this project is both enjoyable and rewarding, making it a great piece to showcase your skills.

    Daisy Crochet Bandana Pattern — Granny Square Hair Kerchief with Scalloped Edge

    Crochet Bandana Pattern Overview

    • Skill Level: Intermediate
    • Finished Dimensions: Varies based on tension
    • Crochet Hook Size: 4 mm (G)
    • Yarn Type: Cotton Blend
    • Yarn Weight: Worsted
    • Main Colors: Sage green, assorted flower colors
    • Stitch Pattern: Granny squares with scalloped edging
    • Construction Method: Join granny squares
    • Approximate Completion Time: 6-8 hours
    • Beginner-Friendly: No, suitable for those with basic skills
    • Technique: Granny squares

    Materials You’ll Need

    • Worsted weight cotton yarn in various colors
    • 4 mm (G) crochet hook
    • Yarn needle for weaving ends
    • Stitch markers for keeping track of rounds
    • Scissors for cutting yarn
    • Measuring tape for checking dimensions

    Crochet Abbreviations

    • ch = chain
    • sc = single crochet
    • hdc = half double crochet
    • dc = double crochet
    • sl st = slip stitch
    • st = stitch
    • rep = repeat

    Before You Start

    Before diving into this crochet bandana pattern, it’s essential to ensure you understand how to work granny squares and maintain even tension for a cohesive look. As this pattern involves joining multiple squares, familiarizing yourself with the method of connecting them will help achieve a polished final product. Plan out your color changes before starting, as this will make the process smoother and your bandana visually stunning.

    Free Crochet Bandana Pattern

    Starting Chain or Foundation

    Begin with the first granny square:

    1. Start with a magic ring.
    2. Chain 3 (counts as first dc).
    3. Work 2 dc into the ring, ch 2.
    4. Repeat (3 dc, ch 2) for a total of 4 times to create your square.

    First Row

    Continue rounds with:

    1. Join with sl st to the top of the initial ch 3.
    2. Ch 3, (2 dc, ch 2, 3 dc) in corner spaces, repeat along edges.

    Building the Triangle

    Join the granny squares into a triangle formation as you go along, ensuring to maintain the correct angles.

    Increasing Rows

    To shape the bandana, gradually add additional granny squares at the triangle’s base. Continue alternating between rows of squares and connecting them.

    Granny Square Motifs

    Crochet several granny squares, approximately 9-12, depending on your desired size.

    Joining Granny Squares

    Use slip stitches to attach each square, aligning edges to create a unified look.

    Decorative Border

    Once the main section is complete, create a decorative border around the entire bandana.

    Scalloped Edging

    Finish with a scalloped edging:

    1. In each ch-2 space, work (3 dc, ch 1, 3 dc).
    2. Skip to the next ch-2 corner space, and repeat.

    Crochet Ties

    Crochet two long chains or a series of connected chains for the ties, ensuring they are long enough to securely fasten the bandana.

    Finishing the Bandana

    Weave in all ends and block the finished bandana to ensure it lies flat and retains its shape.

    Bandana Construction and Assembly

    Assembling the bandana involves connecting the granny squares into a triangular shape. Once the squares are joined, the decorative border will enhance its overall look. The ties are essential for securing the bandana when worn, so ensure they are sturdy and well-constructed.

    Crochet Bandana Edging and Finishing Details

    The scalloped edging gives this bandana an elegant touch. Upon completing the edge, check that all loose ends are securely woven in. Blocking will help keep the design neat and defined.

    How to Wear and Style Your Crochet Bandana

    The Daisy Crochet Bandana can be styled in numerous ways:

    • As a classic headscarf for a chic summer look.
    • Wrapped around a bun for a bohemian vibe.
    • Tied loosely around the neck for a casual, trendy accessory.
    • Ideal for beach outings or outdoor festivals styled with sundresses.

    Tips for a Better Result

    • Maintain consistent yarn tension for even squares.
    • Check your stitch counts regularly to avoid any inaccuracies.
    • Ensure the triangle remains symmetrical throughout the construction.
    • Work color changes neatly for clean lines.

    Crochet Bandana Customization Ideas

    Consider personalizing your bandana by experimenting with different yarn colors or patterns. You may opt for contrasting borders or longer ties to suit your style preferences.

    Common Problems and Troubleshooting

    If you encounter issues, here are a few troubleshooting tips:

    • Check for uneven tension causing the triangle to skew.
    • Ensure correct stitch counts in each row.
    • If edges curl, consider blocking to smooth them out.
    • Check symmetry regularly during assembly.

    Care and Maintenance

    To maintain your crochet bandana, follow the yarn manufacturer’s care instructions. Hand wash gently in cool water, and lay flat to dry to preserve the shape and stitches.

    Frequently Asked Questions

    Is this crochet bandana pattern beginner-friendly?
    No, it is better suited for intermediate crocheters familiar with granny squares.

    What yarn is best for a crochet bandana?
    A cotton blend yarn works well due to its breathability and lightweight nature.

    How long does it take to crochet a bandana?
    Most people can complete this bandana in 6-8 hours, depending on their experience level and tension.

    Can I make this crochet bandana larger or smaller?
    Yes, you can adjust the number of granny squares to modify size.

    How do I keep the triangular shape even?
    Regularly check symmetry throughout the crocheting process, adjusting as needed.

    Can I use different yarn colors?
    Absolutely! Feel free to mix and match colors to personalize your bandana.

    How do I make the crochet bandana ties?
    Crochet long chains or braided strands from the same yarn used in the bandana.

    Can I wear this bandana in summer?
    Yes, it’s perfect for summer as it provides stylish sun protection.

    Conclusion

    The Daisy Crochet Bandana is a beautiful, versatile project that brings together traditional crochet techniques with modern styling. Its granny square design, complemented by a splendid scalloped edge, makes it a delightful addition to any wardrobe. Don’t hesitate to try your hand at this charming pattern; it’s sure to become a cherished piece in your summer accessory collection!


    SEO Title: Crochet Bandana Pattern – Daisy Granny Square Headscarf
    Meta Description: Discover the free crochet bandana pattern for a lovely Granny Square hair kerchief with a scalloped edge. Perfect summer accessory for stylish looks!
    URL Slug: daisy-crochet-bandana-pattern
    Primary Keyword: crochet bandana pattern
    Secondary Keywords: free crochet bandana pattern, crochet headscarf pattern, triangle crochet bandana, granny square bandana, summer crochet bandana
    Image 1 Alt Text: Daisy crochet bandana in granny square design
    Image 2 Alt Text: Scalloped edged crochet bandana styled elegantly

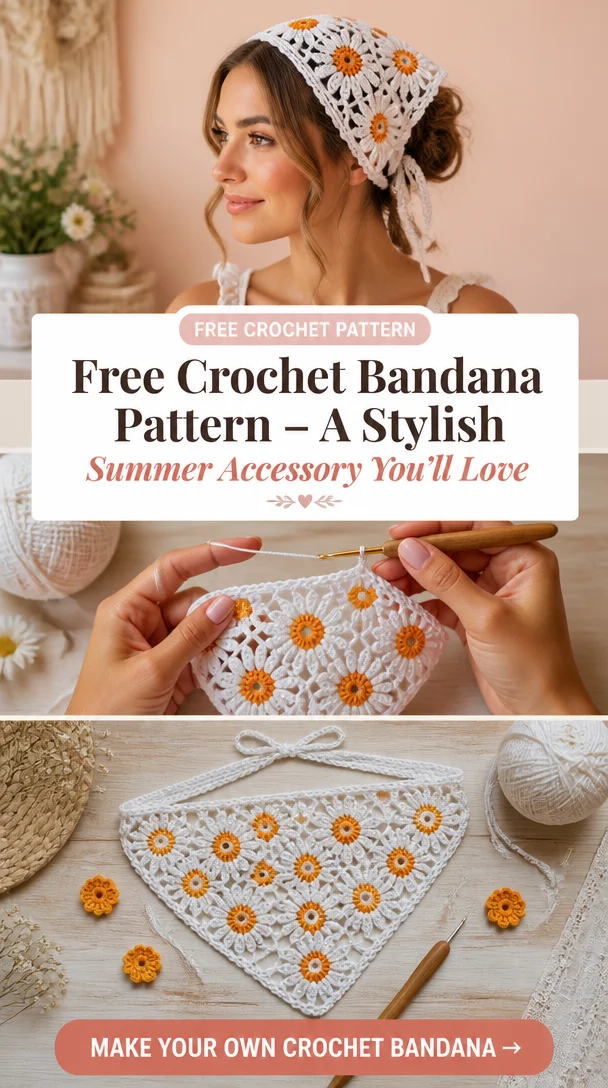
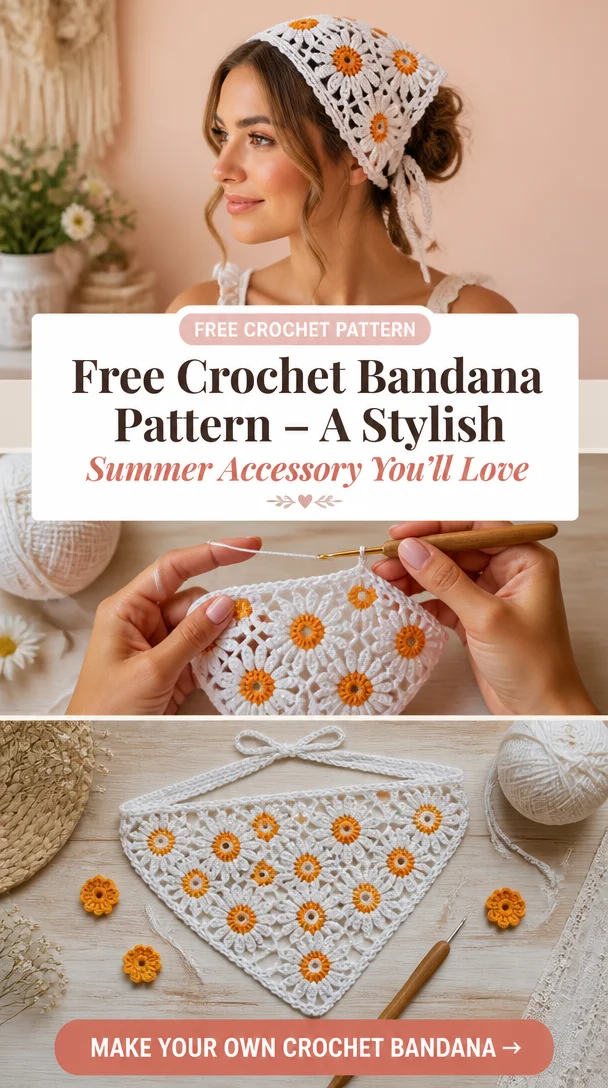
  • Free Crochet Bandana Pattern – A Stylish Summer Accessory You’ll Love

    Free Crochet Bandana Pattern – A Stylish Summer Accessory You’ll Love

    12 Crochet Bandana Free Patterns

    Crochet bandanas are versatile and stylish accessories that add a unique flair to any outfit. These chic triangle-shaped pieces not only keep your hair in place but also serve as fashionable headscarves during sunny days or festivals. With their intricate designs and customizable colors, crochet bandanas offer a perfect blend of functionality and fashion. Whether you’re a seasoned crocheter or a beginner, creating your own bandana allows for personal expression and creativity. Imagine wearing a handmade accessory that complements your style while showcasing your crafting skills!

    Free Crochet Bandana Pattern – A Stylish Summer Accessory You'll Love

    Crochet Bandana Pattern Overview

    • Skill Level: Beginner-friendly
    • Finished Dimensions: Adjustable based on individual preferences
    • Crochet Hook Size: H/8 (5 mm) recommended
    • Yarn Type: Cotton or lightweight acrylic
    • Yarn Weight: Worsted weight or DK
    • Main Colors: Any solid or mixed colors of your choice
    • Stitch Pattern: Basic stitches, triangles, or granny squares
    • Construction Method: Triangle or granny squares
    • Approximate Completion Time: 2-4 hours
    • Additional Notes: Can be customized with decorative borders

    Materials You’ll Need

    • Yarn (in preferred colors)
    • Crochet hook (size H/8 or compatible)
    • Yarn needle
    • Stitch markers (optional)
    • Scissors
    • Measuring tape
    • Optional decorative elements (e.g., beads, tassels)

    Crochet Abbreviations

    • ch = chain
    • sc = single crochet
    • hdc = half double crochet
    • dc = double crochet
    • sl st = slip stitch
    • st = stitch
    • sp = space
    • rep = repeat

    Before You Start

    Before diving into the pattern, take a moment to familiarize yourself with any stitch repeats and the basic construction method. For triangle-based bandanas, understanding increases is crucial for achieving the right shape. If you’re working with granny squares, keep an eye on the stitch counts for seamless joins. Always check your gauge to ensure a perfect fit and manage your yarn tension for an even finish.

    Free Crochet Bandana Pattern

    Starting Chain or Foundation

    Start with a slip knot and chain 5. Join with a slip stitch to form a ring.

    First Row

    Row 1: Ch 2 (counts as first dc), 2 dc in the ring, ch 2, 3 dc in the ring.

    Building the Triangle

    Row 2: Turn, ch 2, 3 dc in the ch-2 space, ch 2, 3 dc in the same space.

    Increasing Rows

    Repeat Row 2 until the bandana reaches your desired width.

    Granny Square Motifs

    If using granny squares, chain 3 to start and create 3 dc in the center, then chain 2 and repeat for each round until you reach the size you want.

    Joining Granny Squares

    When all motifs are complete, use slip stitches to join squares together, alternating colors for added style.

    Decorative Border

    Once assembled, add a final round of a contrasting color for your border, using a simple sc or decorative stitch.

    Scalloped Edging

    To add a scalloped edge, work [5 dc] in each stitch along the edge, skipping a stitch between each set.

    Crochet Ties

    For ties, chain about 40-60 inches and attach to the corners.

    Finishing the Bandana

    Fasten off, weave in ends, and check that all seams are secure.

    Bandana Construction and Assembly

    As you construct your crochet bandana, focus on creating a symmetrical triangular shape for an aesthetic finish. If you’ve opted for granny squares, ensure they are aligned for a cohesive look. Attach ties securely at the corners and finish your edges neatly.

    Crochet Bandana Edging and Finishing Details

    Complete the edges of your bandana with a decorative stitch of your choosing. A scalloped border can enhance the overall look, providing a soft finish. Remember to weave in all yarn ends to maintain a clean appearance.

    How to Wear and Style Your Crochet Bandana

    There are countless ways to style your crochet bandana:

    • As a classic headscarf
    • A chic summer hair accessory
    • Pairing it with a boho-inspired outfit
    • Incorporating it into casual everyday wear
    • Wearing it to beach outings or festivals
    • Gifting it to a friend or loved one

    Tips for a Better Result

    • Maintain consistent tension throughout your stitches for an even appearance.
    • Ensure the triangle remains symmetrical by following the increase pattern closely.
    • Pay attention to edge finishing to prevent curling.
    • Practice your color changes for neat transitions between yarns.
    • Check the fit around your head before finalizing ties.

    Crochet Bandana Customization Ideas

    Consider personalizing your bandana with these ideas:

    • Use different colors of yarn to match your wardrobe.
    • Experiment with contrasting borders.
    • Utilize cotton yarn for a breathable summer accessory.
    • Modify the length of ties based on your preference.
    • Add decorative edging for extra flair.

    Common Problems and Troubleshooting

    • Uneven triangle shapes can often arise from incorrect increases; make sure to double-check your stitch counts.
    • If edges are curling, check your tension and consider blocking your finished piece.
    • For granny squares, ensure they align properly before joining to avoid mismatched seams.

    Care and Maintenance

    Maintaining your handmade crochet bandana is essential for longevity. Follow the yarn manufacturer’s care instructions regarding washing and drying. To maintain its shape and protect delicate stitches, it’s best to hand wash gently and lay flat to dry.

    Frequently Asked Questions

    • Is this crochet bandana pattern beginner-friendly?
      Yes, this pattern is designed for beginners and is easy to follow.

    • What yarn is best for a crochet bandana?
      Lightweight cotton or acrylic yarn works well for a crochet bandana, ensuring comfort and breathability.

    • How long does it take to crochet a bandana?
      Typically, you can complete a crochet bandana in 2-4 hours, depending on your speed and experience level.

    • Can I make this crochet bandana larger or smaller?
      Yes, you can adjust the starting chain or modify the stitch count to customize the size.

    • How do I keep the triangular shape even?
      Follow the increase pattern consistently to maintain an even shape throughout your piece.

    • Can I use different yarn colors?
      Absolutely! Feel free to experiment with different color combinations to showcase your style.

    • How do I make the crochet bandana ties?
      For ties, simply chain a length of your choice and attach them to the corners of the bandana.

    • Can I wear this bandana in summer?
      Definitely, a crochet bandana is a perfect summer accessory, offering both style and protection from the sun.

    Conclusion

    Crocheting your own bandana not only enhances your crafting skills but also results in a stunning accessory you’ll love wearing. This unique piece is not just a fashion statement but also a testament to your creativity. So gather your materials and get started on this fun project—your new favorite accessory awaits!


    SEO Title: 12 Crochet Bandana Free Patterns for Fashionable Hair Accessories
    Meta Description: Discover 12 free crochet bandana patterns to create stylish hair accessories. Perfect for summer wear!
    URL Slug: crochet-bandana-patterns
    Primary Keyword: crochet bandana
    Secondary Keywords: free crochet bandana pattern, crochet headscarf pattern, easy crochet bandana, handmade crochet headscarf, triangle crochet bandana
    Image 1 Alt Text: A beautifully crocheted bandana in vibrant colors displayed on a mannequin.
    Image 2 Alt Text: Close-up of stitches showcasing the intricacy of a crochet bandana design.

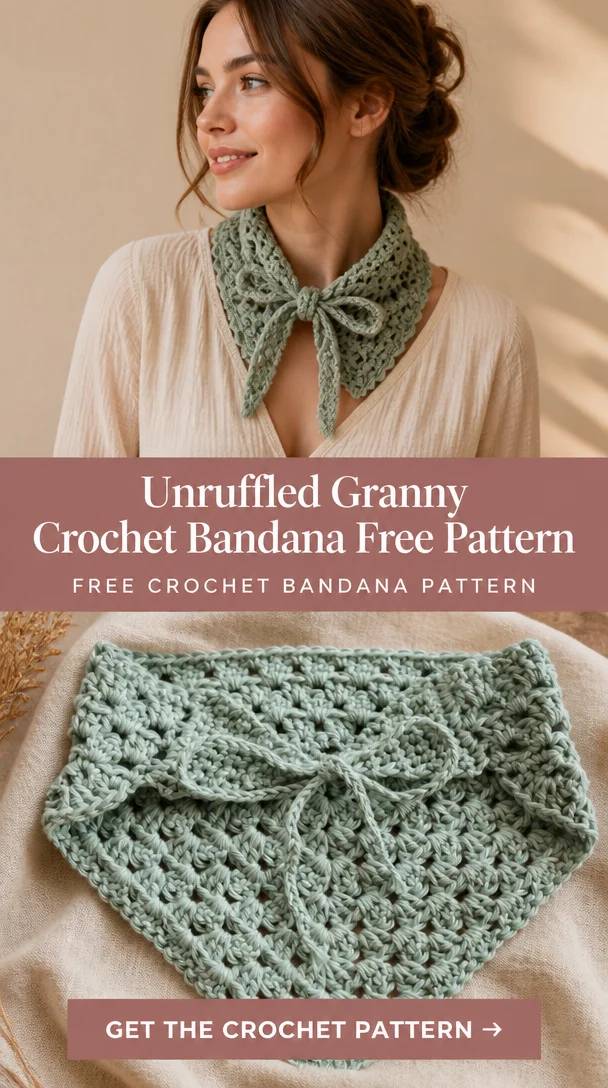
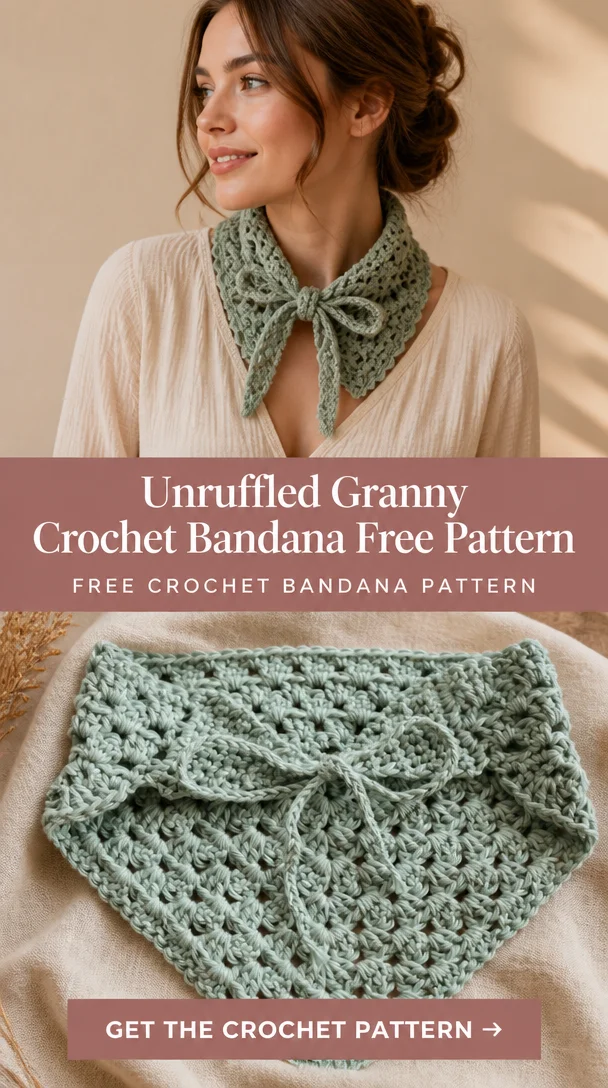
  • Unruffled Granny Crochet Bandana Free Pattern

    Unruffled Granny Crochet Bandana Free Pattern

    Unruffled Granny Crochet Bandana Free Pattern

    Are you searching for a stylish yet comfortable accessory for the summer months? Look no further! The Unruffled Granny Crochet Bandana is the perfect blend of elegance and functionality. Utilizing the classic granny stitch, this lightweight headscarf lays flat and avoids the bulkiness often associated with traditional bandanas. Whether you’re looking to add a unique touch to your outfits or seeking a thoughtful handmade gift for a friend, this crochet bandana pattern is your go-to project. Best of all, it’s beginner-friendly, so even those new to crochet can enjoy the satisfaction of creating a lovely hair accessory. With a video tutorial included to guide you through each step, you’ll be sporting your new bandana in no time.

    Unruffled Granny Crochet Bandana Free Pattern

    Crochet Bandana Pattern Overview

    • Skill Level: Beginner
    • Finished Dimensions: Adjustable (depends on ties)
    • Crochet Hook Size: Recommended size will be provided in detailed sections
    • Yarn Type: Lightweight cotton or acrylic blend recommended
    • Yarn Weight: Worsted or DK weight
    • Main Colors: Your choice
    • Stitch Pattern: Classic granny stitch
    • Construction Method: Triangle bandana with granny square motifs
    • Approximate Completion Time: 3-5 hours
    • Additional Notes: Ideal as a versatile hair accessory for various occasions.

    Materials You’ll Need

    • Lightweight cotton or acrylic yarn
    • Crochet hook (appropriate size for your yarn weight)
    • Yarn needle
    • Stitch markers
    • Scissors
    • Measuring tape
    • Optional: Decorative buttons or embellishments

    Crochet Abbreviations

    • ch = chain
    • sc = single crochet
    • hdc = half double crochet
    • dc = double crochet
    • sl st = slip stitch
    • st = stitch
    • sp = space
    • rep = repeat

    Before You Start

    Before diving into the pattern, it’s helpful to familiarize yourself with the granny stitch repeat. Make sure you maintain even yarn tension for a polished finish. Don’t forget to read through the pattern to understand the flow of the project, and prepare to identify the right and wrong sides of your work. This will ensure your bandana lays correctly when worn. And, if planning to change colors, have those ready too!

    Free Crochet Bandana Pattern

    Starting Chain or Foundation

    Begin with a slip knot and chain 4. Join with a slip stitch to form a ring.

    First Row

    Row 1: Inside the ring, ch 3 (counts as first dc), then make 2 dc into the ring. Ch 1, then make 3 dc into the ring. Repeat from * to * 2 more times. Join with a sl st to the top of the beginning ch-3. You should have four groups of 3 dc separated by ch-1 spaces.

    Building the Triangle

    Increasing Rows

    Row 2: Ch 3, turn. In the first ch-1 space, make 3 dc. Ch 1, in the next ch-1 space, make 3 dc. Repeat for remaining spaces. Join with sl st to the top of ch-3.

    Continue adding increasing rows until the desired height is achieved, maintaining the initial structure.

    Granny Square Motifs

    (Optional decorative squares can be added at this stage if desired and can be made separately before joining.)

    Joining Granny Squares

    If using side squares, join them by placing them right sides together and slip stitch through the chains along the edges. Leave spaces open for a flowy design.

    Decorative Border

    Once all motifs are joined, you may choose to add a decorative border around the entire bandana.

    Scalloped Edging

    To create a scalloped edge, attach yarn to the border and work in a sc, ch 2, sc pattern along the edge.

    Crochet Ties

    To create ties, chain approximately 60-75 inches (adjust as needed) and secure tightly at both ends. Attach these to the corners of the triangle.

    Finishing the Bandana

    Weave in all loose ends and trim any excess yarn. Optionally, block your bandana to enhance its shape.

    Bandana Construction and Assembly

    The construction of the Unruffled Granny Crochet Bandana involves creating a triangular shape with granny squares optionally added for extra flair. After forming the triangle, the granny squares can be seamlessly integrated into the triangle’s edges. The ties are then securely attached to complete this stylish piece.

    Crochet Bandana Edging and Finishing Details

    Finish the edges with your choice of decorative scallops for an eye-catching design. Be sure to keep the yarn ends tucked and neatened for a polished look. The bandana’s final styling can be set with a gentle blocking if needed.

    How to Wear and Style Your Crochet Bandana

    • Classic Headscarf: Perfect for casual outings.
    • Summer Hair Accessory: Adds flair to your beachwear.
    • Boho-Inspired Outfit: Complement vintage styles effortlessly.
    • Casual Everyday Accessory: Pair with jeans and a t-shirt.
    • Festival Fashion: Stand out with colorful prints and patterns.
    • Thoughtful Handmade Gift: Ideal for friends who love crochet crafts.

    Tips for a Better Result

    • Maintain consistent tension to keep your edges even.
    • Check for symmetrical triangle shapes as you work.
    • Keep color changes neat to avoid visibility discrepancies.
    • Practice making clean joins if you’re adding granny squares.

    Crochet Bandana Customization Ideas

    • Experiment with different yarn colors to match any outfit.
    • Use contrasting borders for a more dynamic look.
    • Adjust the length of your ties based on personal preference.
    • Consider wool blends for winter versions or heavier designs.

    Common Problems and Troubleshooting

    • If the triangle shape is uneven, check your stitches.
    • For incorrect stitch counts, revise each row to see where the error occurred.
    • To prevent curling edges, ensure you follow your pattern accurately.
    • For Granny squares not aligning, be vigilant about your joining stitches.

    Care and Maintenance

    To maintain the shape and integrity of your crochet bandana, follow the yarn manufacturer’s care instructions. Hand wash in cold water and air dry, taking care to lay flat to avoid warping your beautiful work.

    Frequently Asked Questions

    • Is this crochet bandana pattern beginner-friendly?
      Yes, it’s perfect for beginners with its simple stitches and straightforward approach.

    • What yarn is best for a crochet bandana?
      A lightweight cotton or acrylic yarn is recommended for comfort and breathability.

    • How long does it take to crochet a bandana?
      Most people complete it in about 3-5 hours, depending on speed and skill level.

    • Can I make this crochet bandana larger or smaller?
      Yes, by adjusting the starting chain and increasing rows, you can customize the size.

    • How do I keep the triangular shape even?
      Regularly check your stitch counts for alignment and ensure consistent tension throughout.

    • Can I use different yarn colors?
      Absolutely! Experiment with colors that suit your personal style.

    • How do I make the crochet bandana ties?
      Simply chain the desired length, tie off securely, and attach them to the corners.

    • Can I wear this bandana in summer?
      Yes, its lightweight design makes it ideal for warmer weather.

    Conclusion

    The Unruffled Granny Crochet Bandana is a versatile addition to your crochet repertoire, beautifully combining style and functionality. Its lightweight design, achievable with the classic granny stitch, makes it ideal for any crochet enthusiast, especially those looking to make a unique fashion statement. Embrace this project and enjoy the satisfaction of creating a handmade accessory.


    SEO Title: Unruffled Granny Crochet Bandana Pattern – Free Guide
    Meta Description: Discover the stylish Unruffled Granny Crochet Bandana pattern. Perfect for beginners, this lightweight accessory features the classic granny stitch!
    URL Slug: unruffled-granny-crochet-bandana-pattern
    Primary Keyword: Unruffled Granny Crochet Bandana Free Pattern
    Secondary Keywords: free crochet bandana pattern, easy crochet bandana, crochet headscarf pattern, crochet hair scarf, summer crochet bandana
    Image 1 Alt Text: Unruffled Granny Crochet Bandana displayed on a model
    Image 2 Alt Text: Close-up of the crochet bandana’s granny stitch pattern

  • How to Crochet a Bandana + Free Easy Pattern

    How to Crochet a Bandana + Free Easy Pattern

    How to Crochet a Bandana + Free Easy Pattern

    Crocheting a bandana is a delightful way to create a fashionable accessory that adds a touch of charm to any outfit. This unique design combines functionality with style, making it a perfect piece for summer hair accessories or everyday wear. With its cottage-core-inspired granny stripe pattern, this crochet bandana can be worn as a headscarf or enhanced with cute ties to elevate your look. Whether you’re a seasoned crocheter or just starting out, this easy pattern is suitable for all skill levels and promises hours of crafting joy. So grab your cool cotton yarn, and let’s get started on this delightful project that will surely bring a smile to your face!

    How to Crochet a Bandana + Free Easy Pattern

    Crochet Bandana Pattern Overview

    • Skill Level: Beginner-friendly
    • Finished Dimensions: Approximately 20 inches wide at the top and 14 inches tall at the tip
    • Crochet Hook Size: 5 mm (H/8)
    • Yarn Type: 100% cotton yarn
    • Yarn Weight: Worsted
    • Main Colors: Your choice (suggesting pastel or vibrant tones)
    • Stitch Pattern: Granny stripe pattern
    • Construction Method: Worked in rows to form a triangle
    • Approximate Completion Time: 2-3 hours
    • Technique: Simple rows; no granny squares involved

    Materials You’ll Need

    • Cotton yarn
    • Crochet hook (5 mm / H-8)
    • Yarn needle
    • Stitch markers
    • Scissors
    • Measuring tape

    Crochet Abbreviations

    • ch = chain
    • sc = single crochet
    • dc = double crochet
    • sl st = slip stitch
    • st = stitch
    • sp = space
    • rep = repeat

    Before You Start

    Before diving into the crochet bandana pattern, it’s helpful to understand a few essential tips. Pay attention to maintaining even yarn tension to achieve a consistent look. Familiarize yourself with the granny stripe stitch repeat, ensuring you keep track of both color changes and stitch counts. Lastly, be mindful of checking the gauge to ensure your finished bandana turns out the desired size.

    Free Crochet Bandana Pattern

    Starting Chain or Foundation

    Start with a foundation chain of 45 chains.

    First Row

    Row 1: In the 4th chain from the hook, work 1 dc. Skip 2 chains, (1 dc in the next chain, 1 ch); repeat from * to the end of the row. Turn.

    Building the Triangle

    Row 2: Ch 3 (counts as the first dc), work 1 dc in the same space. In the next ch-1 space, (2 dc, 1 ch, 2 dc); repeat from * to the end. Turn.

    Increasing Rows

    Row 3: Ch 3, (1 dc in first space) In each ch-1 space, (2 dc, 1 ch, 2 dc); repeat to end. Turn.

    Continue increasing until the desired height is reached, keeping to the granny stripe pattern throughout.

    Decorative Border

    Finish off and create a simple border around the bandana by working one round of sc around the entire edge.

    Crochet Bandana Edging and Finishing Details

    To complete your crochet bandana, weave in all yarn ends neatly. Optionally, you can add a scalloped edge or picot border for an extra decorative touch. Ensure the triangle shape is symmetrical and neatly pressed through blocking if necessary.

    How to Wear and Style Your Crochet Bandana

    Your crochet bandana can be styled in various ways, such as:

    • As a classic headscarf to keep your hair in place
    • A chic accessory to enhance your summer outfit
    • Paired with a boho-inspired ensemble for a rustic vibe
    • Perfect for beach days or summer festivals
    • Given as a handmade gift to friends or family

    Tips for a Better Result

    • Maintain consistent tension to avoid uneven edges.
    • Regularly check your stitch count to keep the triangle symmetrical.
    • Practice neat color changes to ensure a polished look.
    • Ensure your ties are the right length and securely attached.

    Crochet Bandana Customization Ideas

    • Experiment with different yarn colors or combinations for a unique look.
    • Customize the size by adjusting the foundation chain.
    • Create longer or shorter ties based on your styling preferences.
    • Try using contrasting colors for the border to make it pop.

    Common Problems and Troubleshooting

    • If you find your bandana shape is uneven, check to see if your tension is consistent.
    • To prevent edges from curling, ensure you’re working the stitches accurately.
    • Granny squares misalignment can often be fixed by double-checking your stitch counts.

    Care and Maintenance

    For longevity, wash your crochet bandana according to the yarn manufacturer’s care instructions. Lay it flat to dry to maintain its shape and protect delicate stitches. Consider storing it in a cool, dry place away from direct sunlight.

    Frequently Asked Questions

    • Is this crochet bandana pattern beginner-friendly?
      Yes, it is designed to be accessible for beginners.

    • What yarn is best for a crochet bandana?
      A soft and breathable cotton yarn works well, especially for summer wear.

    • How long does it take to crochet a bandana?
      The project typically takes about 2-3 hours.

    • Can I make this crochet bandana larger or smaller?
      Yes, you can adjust the foundation chain to change the size.

    • How do I keep the triangular shape even?
      Focus on maintaining consistent tension throughout the project.

    • Can I use different yarn colors?
      Absolutely! Mixing colors can add a personal touch to your bandana.

    • How do I make the crochet bandana ties?
      Simply chain the desired length and attach them securely to each corner.

    Conclusion

    Crocheting a bandana is not only a fun project but also results in a versatile accessory perfect for sunny days. With the easy granny stripe pattern and customization options, you can make this bandana uniquely yours. So gather your materials and enjoy the creative process of crafting your very own crochet bandana!


    SEO Title: How to Crochet a Bandana: Free Easy Pattern

    Meta Description: Discover how to crochet a cute bandana with our free easy pattern. Perfect for beginners, this crochet headscarf features a charming granny stripe design.

    URL Slug: crochet-bandana-easy-pattern

    Primary Keyword: crochet bandana

    Secondary Keywords: free crochet bandana pattern, crochet headscarf pattern, triangle crochet bandana, summer crochet bandana, boho crochet bandana

    Image 1 Alt Text: Handmade crochet bandana featuring granny stripes pattern

    Image 2 Alt Text: Close-up of the finished crochet bandana with ties

  • Quick Crochet Bandana You’ll Make Twice (38 chars)

    Quick Crochet Bandana You’ll Make Twice (38 chars)

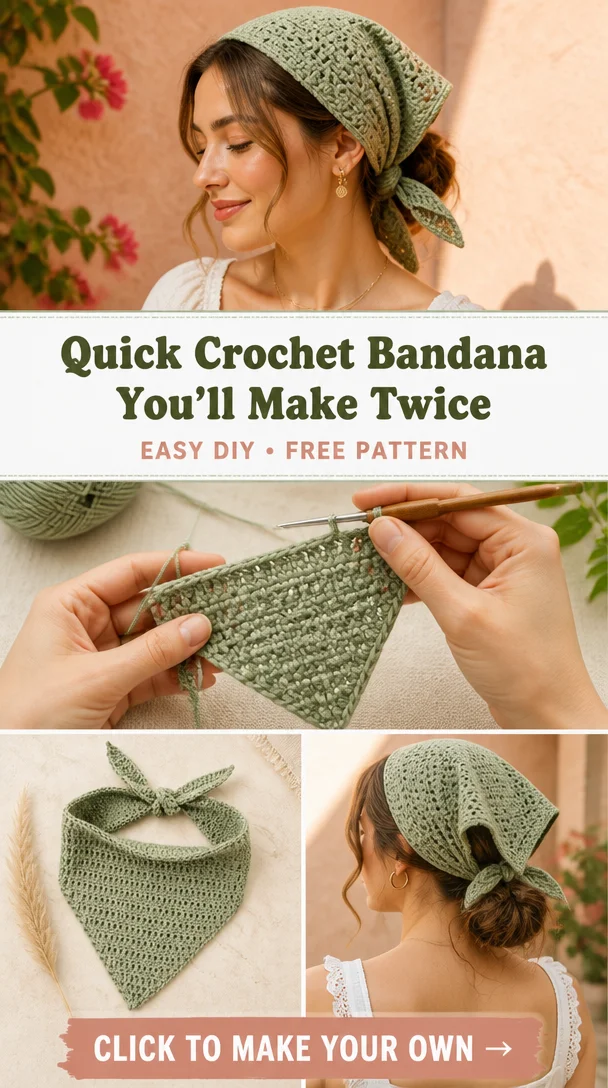
    Quick Crochet Bandana You’ll Make Twice

    The crochet bandana is not just a practical hair accessory but a stylish addition to your wardrobe. This minimal, breezy, triangle design is perfect for showcasing your crochet skills while adding a touch of flair to your look. With this easy-to-follow pattern, you can create a stunning bandana that can be worn as a headscarf, making it not only a great project for yourself but also a delightful handmade gift for friends and family. Ideal for beginners, this one-skein project is as satisfying to crochet as it is to wear, especially during the warm summer months. Whether you’re out for a casual day or attending a festival, this crochet bandana is sure to elevate your style.

    Quick Crochet Bandana You'll Make Twice (38 chars)

    Crochet Bandana Pattern Overview

    • Skill Level: Beginner
    • Finished Dimensions: Adjustable (depending on tension)
    • Crochet Hook Size: Suggested size based on yarn type
    • Yarn Type: Cotton
    • Yarn Weight: Light worsted or DK
    • Main Colors: Your choice
    • Stitch Pattern: Triangle increases
    • Construction Method: Triangular rows
    • Approximate Completion Time: 2-3 hours
    • Granny Square Technique: Not applicable

    Materials You’ll Need

    • Yarn (cotton, one skein)
    • Crochet hook (appropriate size)
    • Yarn needle
    • Stitch markers
    • Scissors
    • Measuring tape
    • Optional: Decorative beads or embellishments

    Crochet Abbreviations

    • ch = chain
    • sc = single crochet
    • hdc = half double crochet
    • dc = double crochet
    • sl st = slip stitch
    • st = stitch
    • sp = space
    • rep = repeat

    Before You Start

    Before diving into your crochet bandana, keep the following tips in mind:

    • Understand the Stitch Repeat: Familiarize yourself with the triangle increases, as these are essential to shape the bandana correctly.
    • Maintain Even Yarn Tension: Keep your tension consistent for a uniform appearance.
    • Check Gauge: While not always necessary for accessories, checking your gauge can help you achieve the desired fit.
    • Identify Right and Wrong Sides: This will help you keep your edges clean and consistent throughout the project.

    Free Crochet Bandana Pattern

    Starting Chain

    Ch 5, join with a sl st to form a ring.

    First Row

    Row 1: Ch 2 (counts as first hdc), 9 hdc in the ring. Join with a sl st to the top of the ch-2.

    Building the Triangle

    Increasing Rows

    Row 2: Ch 2, 1 hdc in the same st, 1 hdc in each st around. Join.
    Row 3: Repeat as necessary to build your triangle’s height, increasing by 2 hdc each row.

    Bandana Construction and Assembly

    The bandana is made by continually building upon triangle increments. When your desired width is achieved, finish the top edge with a decorative border for a polished look.

    Crochet Bandana Edging and Finishing Details

    To finish your bandana:

    • Work a decorative border around the edges.
    • Make sure to tie off all ends neatly and weave them into the back.
    • Block your finished piece to ensure a clean shape.

    How to Wear and Style Your Crochet Bandana

    Your finished crochet bandana can be worn in a variety of ways:

    • As a classic headscarf—perfect for keeping hair in place
    • Styled for a boho-chic outfit
    • As part of a casual summer attire
    • Decked out with accessories for festivals

    Tips for a Better Result

    • Maintain consistent tension for a symmetrical finish.
    • Check each row as you build to avoid uneven edges.
    • Finish ties neatly for a professional look.

    Crochet Bandana Customization Ideas

    • Experiment with different yarn colors or weight for unique results.
    • Add contrasting borders or decorative edging to personalize your bandana.
    • Adjust the size by changing the starting chain length.

    Common Problems and Troubleshooting

    • Uneven Triangle Shape: Check your tension and stitch count.
    • Edges Curling: Block the bandana after completing.
    • Stitches Looking Loose: Ensure you’re using the right hook size for your yarn.

    Care and Maintenance

    To keep your crochet bandana looking its best, adhere to the manufacturer’s care instructions for the yarn you choose. Hand wash in cold water, lay flat to dry, and reshape as needed.

    Frequently Asked Questions

    • Is this crochet bandana pattern beginner-friendly?
      Yes! Perfect for those just starting.

    • What yarn is best for a crochet bandana?
      Cotton yarn is recommended for breathability and comfort.

    • How long does it take to crochet a bandana?
      Expect about 2-3 hours of work time.

    • Can I make this crochet bandana larger or smaller?
      Yes, adjust the starting chain accordingly.

    • How do I keep the triangular shape even?
      Maintain consistent tension and monitor each increase.

    Conclusion

    This Quick Crochet Bandana pattern is not only enjoyable to make but also serves as a versatile accessory in your crochet collection. With its comfortable fit and stylish design, you’ll want to make one for yourself and a few more for your friends. So grab your hook and yarn and start creating!


    SEO Title: Quick Crochet Bandana Pattern for Beginners
    Meta Description: Discover this easy crochet bandana pattern perfect for summer! Create your stylish headscarf with our beginner-friendly, one-skein project.
    URL Slug: quick-crochet-bandana-pattern
    Primary Keyword: crochet bandana pattern
    Secondary Keywords: crochet headscarf pattern, easy crochet bandana, triangle crochet bandana, crochet bandana for beginners

    Image 1 Alt Text: A beautifully crocheted cotton bandana in a stylish triangle shape, laid flat.
    Image 2 Alt Text: Close-up of the decorative border and ties of the crochet bandana, showcasing craftsmanship.

  • Sage Daisy Lace Hair Kerchief Crochet Pattern

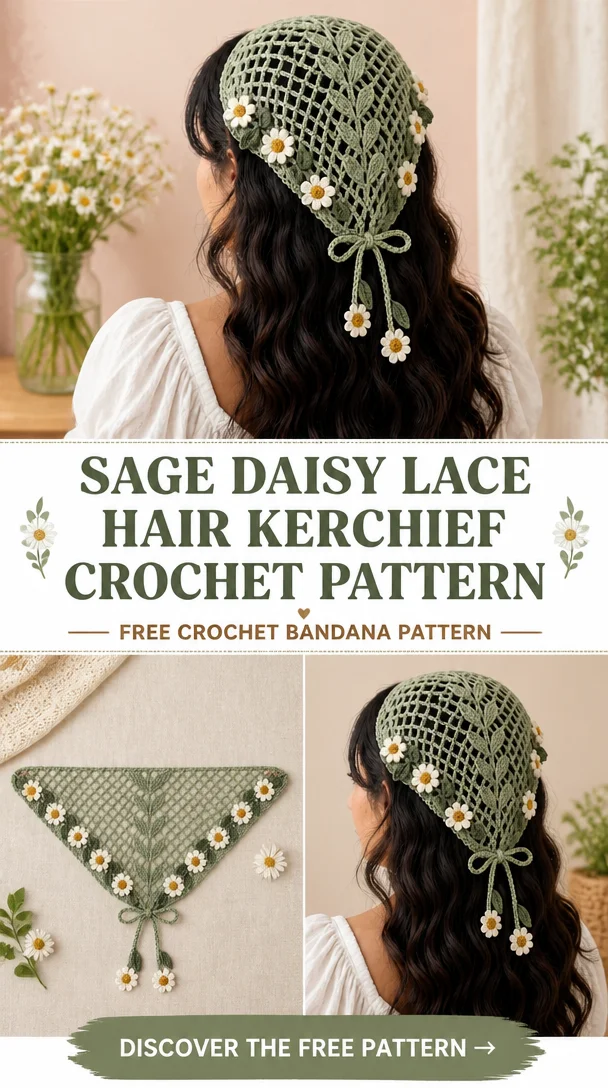
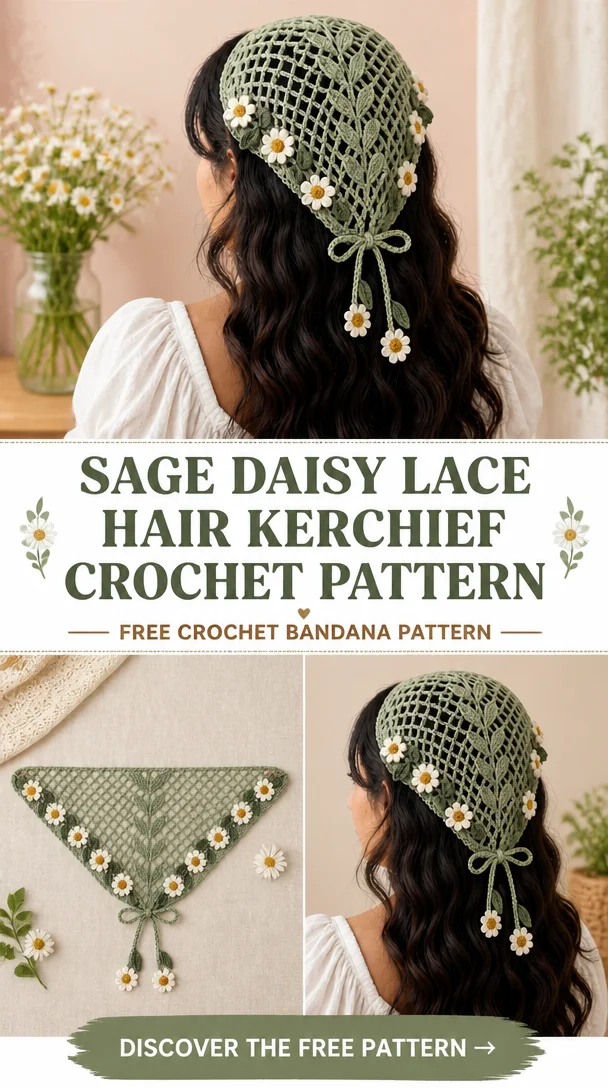
    Sage Daisy Lace Hair Kerchief Crochet Pattern

    Sage Daisy Lace Hair Kerchief Crochet Pattern

    Looking to add a touch of handmade charm to your wardrobe? The Sage Daisy Lace Hair Kerchief is a delightful crochet pattern you can easily make and enjoy. This beautifully crafted bandana features intricate lace designs that provide both elegance and a hint of bohemian flair, making it a perfect accessory for any occasion. It’s not only a stylish hair accessory but also a versatile piece that can elevate your summer outfits or add a cozy layer during cooler months. Suitable for beginners, this free crochet pattern offers step-by-step guidance, allowing you to enhance your DIY crochet skills while creating something truly special. Embrace the creativity and feel proud of crafting your very own hair kerchief!

    Sage Daisy Lace Hair Kerchief Crochet Pattern

    Crochet Bandana Pattern Overview

    • Skill Level: Beginner
    • Finished Dimensions: Adjustable
    • Crochet Hook Size: Size appropriate for yarn weight
    • Yarn Type: Cotton or acrylic yarn (recommended for comfort and breathability)
    • Yarn Weight: DK or Worsted
    • Main Colors: Sage green with optional contrasting colors
    • Stitch Pattern: Lace stitches with chain and double crochet
    • Construction Method: Triangle shape with ties
    • Approximate Completion Time: 3-5 hours
    • Beginner-Friendly: Yes (ideal for novice crocheters)
    • Technique: Primarily constructed in rows, forming a triangular shape

    Materials You’ll Need

    • Yarn (recommended: soft cotton or acrylic)
    • Crochet hook (size to match yarn weight)
    • Yarn needle for weaving in ends
    • Stitch markers (optional, for keeping track of stitch counts)
    • Scissors
    • Measuring tape

    Crochet Abbreviations

    • ch = chain
    • sc = single crochet
    • hdc = half double crochet
    • dc = double crochet
    • sl st = slip stitch
    • st = stitch
    • sp = space
    • rep = repeat

    Before You Start

    Before diving into your Sage Daisy Lace Hair Kerchief, ensure you understand the stitch repeat for the lace pattern. Maintain even tension throughout your project for a polished finish. The pattern’s triangle shape involves increasing rows, so familiarize yourself with this technique. Remember that the right side will feature your lace stitches, while the wrong side will showcase the reverse. Checking your gauge is advisable to ensure the correct sizing for your finished bandana.

    Free Crochet Bandana Pattern

    Starting Chain or Foundation

    • Start by chaining an appropriate number of stitches to create your foundation.

    First Row

    • In your first row, work in single crochet to establish the base before transitioning into your lace pattern.

    Building the Triangle

    • As you move to the next rows, begin to add increases at each end of your rows to form the triangular shape of the kerchief.

    Increasing Rows

    • Continue to work rows of lace stitches while increasing until you reach the desired size for the triangle.

    Decorative Border

    • Once you complete the main body, add a decorative border of slip stitches or a chain stitch for a neat finish.

    Crochet Ties

    • Create ties by chaining a sufficient length on both sides of the kerchief for secure fastening.

    Finishing the Bandana

    • Weave in any loose ends and give your bandana a light blocking to enhance its shape.

    Bandana Construction and Assembly

    To construct your Sage Daisy Lace Hair Kerchief, start by building the triangular shape through a series of chained foundation rows followed by increasing rows. This creates the basic structure that will eventually hold your decorative stitches. After finishing the main body, it’s crucial to add ties that allow you to secure the kerchief comfortably in place. Be sure to block your completed piece gently to avoid any distortions, ensuring it maintains its lovely shape.

    Crochet Bandana Edging and Finishing Details

    For the edging, consider a simple scalloped border or a series of slip stitches around the perimeter, enhancing the overall aesthetic. Don’t forget to weave in loose yarn ends carefully to give your bandana a tidy finish. The ties should be taut but not restrictive, allowing for comfort and flexibility in wear.

    How to Wear and Style Your Crochet Bandana

    Your completed Sage Daisy Lace Hair Kerchief can be styled in various ways:

    • Wear it as a classic headscarf, tying it at the nape of your neck.
    • Pair it with a sundress for a chic summer look.
    • Use it as a boho-inspired accessory for festivals or casual outings.
    • Gift a handmade version to a friend or loved one!

    Tips for a Better Result

    • Always maintain consistent tension in your stitches to keep the triangle symmetrical.
    • Check your progress regularly to avoid corrections later.
    • Keep edges neat by working carefully on color changes or joins.
    • Ensure your ties are even in length for a polished look.

    Crochet Bandana Customization Ideas

    • Experiment with different yarn colors to tailor the kerchief to your personal style.
    • Try contrasting borders for a pop of color.
    • Adjust the length of the ties based on your preference for fit and style.
    • Add decorative elements like buttons or beads to enhance its appearance.

    Common Problems and Troubleshooting

    • If your triangle shape is uneven, check your increases to ensure they are symmetrical.
    • For any curling edges, blocking can help flatten and define the shape.
    • If your stitch count seems off, recount your stitches at each row to ensure accuracy.

    Care and Maintenance

    Care for your crochet bandana by following the yarn manufacturer’s instructions for washing and drying. Hand washing in cold water is often best, followed by laying it flat to dry. This will help maintain its shape and protect the delicate stitches.

    Frequently Asked Questions

    • Is this crochet bandana pattern beginner-friendly?
      Yes, it is designed for novice crocheters with easy-to-follow instructions.

    • What yarn is best for a crochet bandana?
      Soft cotton or lightweight acrylic is recommended for comfort and breathability.

    • How long does it take to crochet a bandana?
      Approximately 3-5 hours depending on your crochet speed.

    • Can I make this crochet bandana larger or smaller?
      Yes, by adjusting the foundation chain and increasing rows.

    • How do I keep the triangular shape even?
      Consistent tension and symmetrical increases are key.

    • Can I use different yarn colors?
      Absolutely! Different colors can add your personal touch.

    • How do I make the crochet bandana ties?
      Simply chain a length of your choice and attach to the ends of the kerchief.

    Conclusion

    The Sage Daisy Lace Hair Kerchief is a marvelous way to express your creativity through crochet. With its beautiful lace design and versatile styling options, this bandana not only enhances your wardrobe but also provides an enjoyable crafting experience. So gather your materials and start creating this lovely accessory today!


    SEO Title: Sage Daisy Lace Hair Kerchief: Free Crochet Bandana Pattern
    Meta Description: Discover the Sage Daisy Lace Hair Kerchief crochet pattern! This beginner-friendly bandana is perfect for adding a handmade touch to your style.
    URL Slug: sage-daisy-lace-hair-kerchief-crochet-pattern
    Primary Keyword: Sage Daisy Lace Hair Kerchief Crochet Pattern
    Secondary Keywords: free crochet bandana pattern, crochet bandana pattern, easy crochet bandana, crochet headscarf pattern, crochet hair scarf, triangle crochet bandana, granny square bandana, summer crochet bandana, boho crochet bandana, crochet bandana for beginners, crochet bandana tutorial, handmade crochet headscarf, crochet bandana with ties
    Image 1 Alt Text: Sage Daisy Lace Hair Kerchief crochet bandana in sage green
    Image 2 Alt Text: Beautifully styled crochet hair scarf worn as a headband

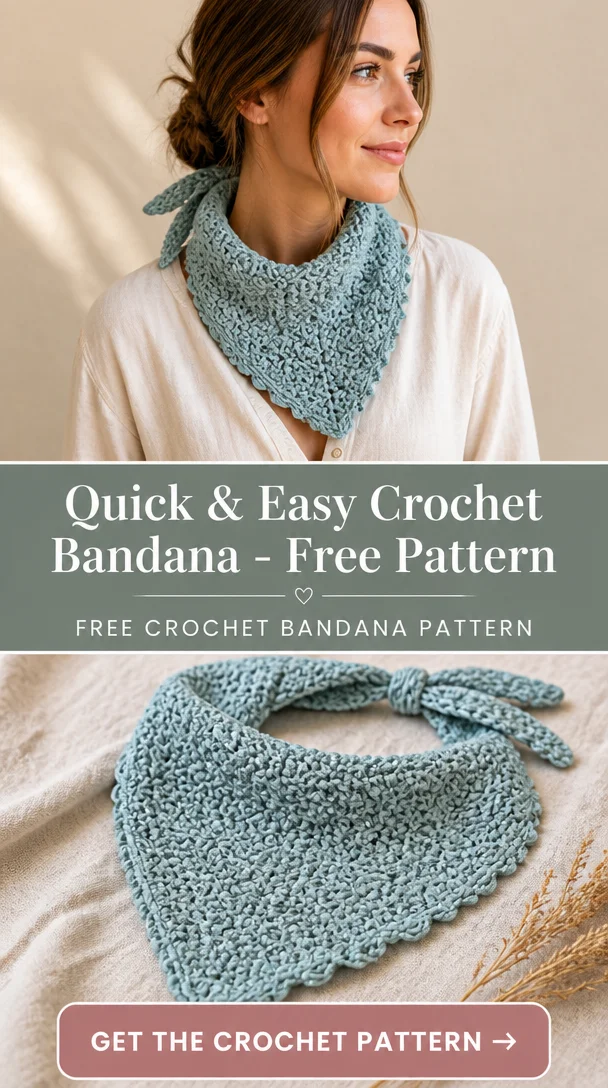
  • Quick & Easy Crochet Bandana – Free Pattern

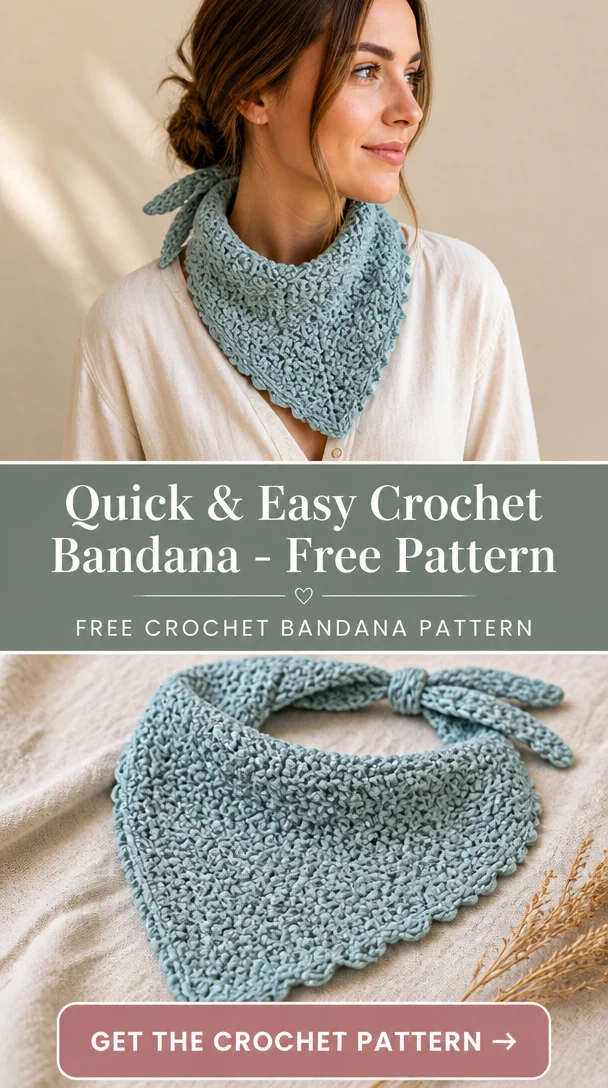
    Quick & Easy Crochet Bandana – Free Pattern

    Quick & Easy Crochet Bandana – Free Pattern

    Crochet bandanas are versatile accessories that combine practicality and style, making them a perfect addition to any wardrobe. This Quick & Easy Crochet Bandana pattern involves only simple stitches, making it a fun and fast project for both novice and experienced crocheters. The finished product is not only aesthetically pleasing but also can be styled in multiple ways as a handmade hair accessory. Whether you’re lounging at the beach, enjoying a summer festival, or simply running errands, this stylish triangle bandana can elevate your outfit. Suitable for all skill levels, this project allows you to express your creativity and add a personal touch to your fashion.

    Quick & Easy Crochet Bandana - Free Pattern

    Crochet Bandana Pattern Overview

    • Skill Level: Beginner
    • Finished Dimensions: Adjustable based on styling
    • Crochet Hook Size: 5.0 mm (H)
    • Yarn Type: Cotton or acrylic
    • Yarn Weight: Worsted weight
    • Main Colors: Your choice
    • Stitch Pattern: Simple crochet stitches
    • Construction Method: Triangle shape using basic stitches
    • Approximate Completion Time: 1-2 hours
    • Beginner-Friendly: Yes

    Materials You’ll Need

    • Worsted weight yarn (color of your choice)
    • 5.0 mm (H) crochet hook
    • Yarn needle
    • Stitch markers (optional)
    • Scissors
    • Measuring tape

    Crochet Abbreviations

    • ch = chain
    • sc = single crochet
    • hdc = half double crochet
    • dc = double crochet
    • sl st = slip stitch
    • st = stitch
    • rep = repeat

    Before You Start

    Before diving into your crochet bandana, familiarize yourself with the stitch repeat and ensure you’re comfortable maintaining even tension. It’s crucial to understand triangle increases, as this will help in forming the shape of the bandana. Additionally, keep in mind the right and wrong sides of your work, and plan any possible color changes throughout the project. Make sure to have your measuring tape handy; checking your finished dimensions will ensure that your bandana fits perfectly.

    Free Crochet Bandana Pattern

    Starting Chain or Foundation

    Chain 5 and connect with a slip stitch to form a loop.

    First Row

    Row 1: Ch 3 (counts as a dc), 2 dc in the loop, ch 1, 3 dc in the loop.

    Building the Triangle

    Row 2: Turn, 1 dc in first st, 2 dc in ch-1 space, 1 dc in the next 3 dc from previous row, 2 dc in ch-1 space, 3 dc in last st.

    Increasing Rows

    Row 3: Turn, ch 3, 1 dc in first st, 2 dc in ch-1 space, 2 dc in each st until the end, 2 dc in last st.

    Finishing the Bandana

    Continue this process until your desired width/length is reached.

    Bandana Construction and Assembly

    Once the main triangle is formed, tie off your yarn, leaving a tail to weave in later. Use a yarn needle to secure any loose ends.

    Crochet Bandana Edging and Finishing Details

    For extra flair, consider a simple slip stitch edging around the triangle, or a scalloped border for added texture. Make sure to tie off and weave in all ends cleanly.

    How to Wear and Style Your Crochet Bandana

    There are numerous ways to wear your crochet bandana! Style it as a classic headscarf, a chic hair accessory for summer outings, or even as a boho-inspired piece to elevate casual outfits. It also makes a thoughtful handmade gift for friends or family.

    Tips for a Better Result

    • Maintain consistent tension throughout your work to keep the edges even.
    • Keep the triangle symmetrical by following the row pattern diligently.
    • Double-check your stitch counts to prevent uneven sections.
    • Finish the ties neatly for a polished look.

    Crochet Bandana Customization Ideas

    You can easily customize your bandana with different yarn colors or combination patterns to match your personal style. Consider contrasting borders or various yarn weights for different textures. Play with the length of the ties for a personalized fit.

    Common Problems and Troubleshooting

    If you encounter issues like an uneven triangle shape:

    • Check your stitch counts frequently.
    • Ensure your tension is even across all stitches.
    • If using granny squares, make sure they align correctly.

    Care and Maintenance

    To maintain your crochet bandana’s shape, follow the yarn manufacturer’s care instructions for washing and drying. Always handle with care to protect the delicate crochet stitches.

    Frequently Asked Questions

    • Is this crochet bandana pattern beginner-friendly?
      Yes! It’s designed for all skill levels.

    • What yarn is best for a crochet bandana?
      A cotton or acrylic worsted weight yarn works well.

    • How long does it take to crochet a bandana?
      About 1-2 hours depending on your skill level.

    • Can I make this crochet bandana larger or smaller?
      Yes, adjust the starting chain as needed.

    • How do I keep the triangular shape even?
      Keep track of your stitch counts and maintain consistent tension.

    • Can I wear this bandana in summer?
      Absolutely! It’s perfect for summer styling.

    Conclusion

    This Quick & Easy Crochet Bandana pattern is a delightful project that allows you to create a stylish and functional accessory. With its simple stitches and versatility, it’s an ideal option for your crochet journey. Whether you keep it for yourself or give it as a gift, you’re sure to enjoy the satisfaction of completing this easy and chic bandana.


    SEO Title: Quick & Easy Crochet Bandana – Free Pattern
    Meta Description: Discover this beginner-friendly Quick & Easy Crochet Bandana pattern! Create a stylish and fun accessory using simple stitches.
    URL Slug: quick-easy-crochet-bandana
    Primary Keyword: crochet bandana pattern
    Secondary Keywords: free crochet bandana pattern, easy crochet bandana, crochet headscarf pattern, summer crochet bandana, handmade crochet headscarf
    Image 1 Alt Text: Finished crochet bandana displaying intricate stitch patterns.
    Image 2 Alt Text: Detailed view of the crochet process for the bandana.

Best Crochet Bandana

Your free crochet ebook

Leave your email address to request your free crochet ebook.


    Join Our Community

    Your email address will be used to handle your ebook request. Privacy policy