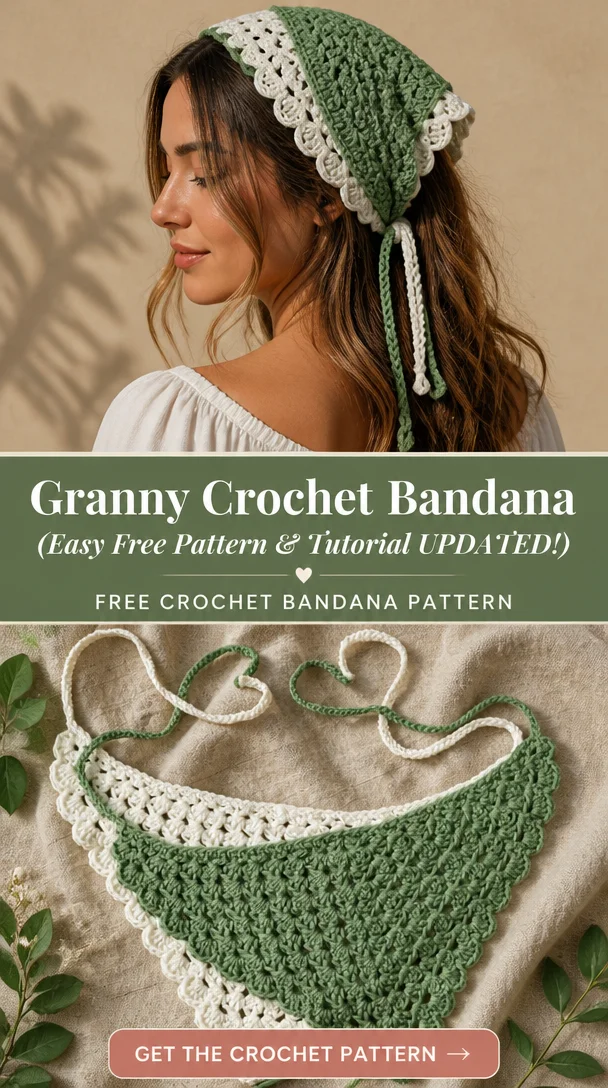
Granny Crochet Bandana (Easy Free Pattern & Tutorial UPDATED!)
Crochet bandanas are the perfect blend of style, functionality, and creativity. This Granny Crochet Bandana pattern not only adds a pop of color to any outfit but also serves as a versatile hair accessory, ideal for summer days. With its charming granny square motifs, this bandana showcases the beauty of handcrafted fashion. Whether you’re dressing up for a festival or enjoying a casual day out, this bandana offers an effortless way to enhance your look. Suitable for crocheters of all skill levels, especially beginners, this pattern invites you to create something truly special while enjoying the process of crochet.
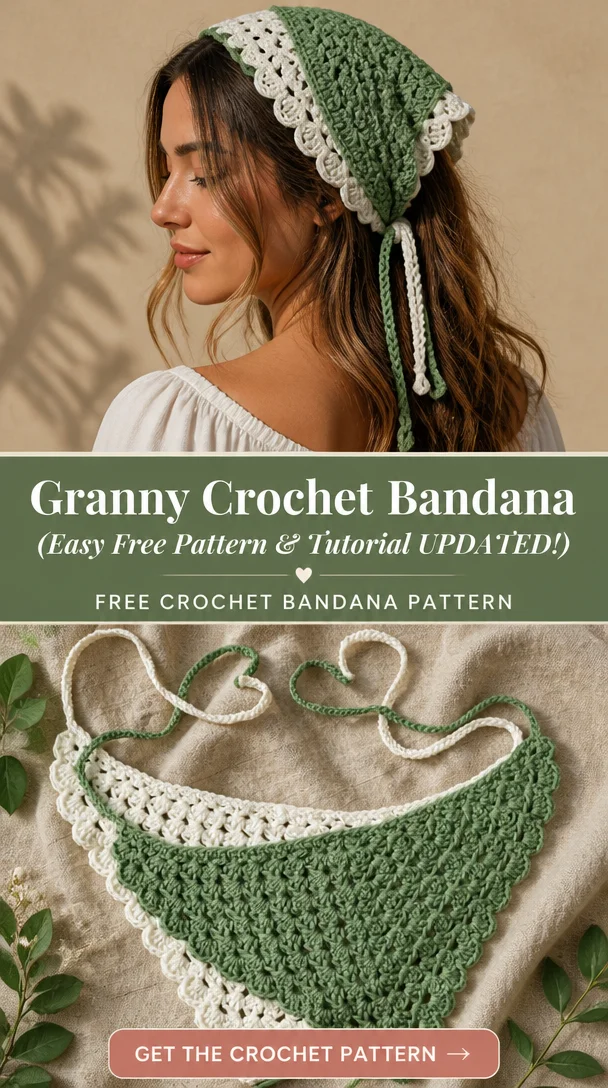
Crochet Bandana Pattern Overview
- Skill Level: Beginner-friendly
- Finished Dimensions: Customizable based on your preference
- Crochet Hook Size: G/6 (4.0 mm)
- Yarn Type: Cotton or acrylic blend
- Yarn Weight: Worsted weight (medium)
- Main Colors: Your choice; bright summer hues recommended
- Stitch Pattern: Granny square and triangle increases
- Construction Method: Combination of granny squares and triangular shape
- Approximate Completion Time: 3-5 hours, depending on your experience
- Pattern Technique: Combines granny squares with rows for a unique bandana design
Materials You’ll Need
- Worsted weight yarn (cotton or acrylic blend)
- G/6 (4.0 mm) crochet hook
- Yarn needle
- Scissors
- Stitch markers
- Measuring tape
- Optional: decorative embellishments
Crochet Abbreviations
- ch = chain
- sc = single crochet
- hdc = half double crochet
- dc = double crochet
- sl st = slip stitch
- st = stitch
- sp = space
- rep = repeat
Before You Start
Before diving into this project, it’s essential to have a few preparations in place. First, familiarize yourself with the granny square motif and ensure you understand the triangle increasing technique used in this pattern. It’s also advisable to maintain even tension for a more polished finish. Use stitch markers to keep your place in various sections, especially when changing from granny squares to triangular rows. Finally, don’t forget to check your gauge to ensure your finished bandana fits nicely.
Free Crochet Bandana Pattern
Starting Chain or Foundation
Begin with a slip knot and chain 4. Join to form a ring.
First Row
Round 1: Ch 3 (counts as first dc), work 2 dc into the ring, *ch 2, 3 dc into the ring; repeat from * two more times. Join with sl st to the top of the beginning ch-3.
Building the Triangle
Row 2: Ch 3, turn. Work 2 dc in the same space as joining. Work 1 dc in each of the next 2 dc, 2 dc in the next ch-2 space.
Increasing Rows
Row 3: Ch 3, turn. *Work 1 dc in the next 3 dc, 2 dc in the next ch-2 space; repeat from * until the end, joining again with sl st.
Granny Square Motifs
Repeat the granny square motif as established throughout your desired size.
Joining Granny Squares
Once your granny squares are completed, lay them out as desired. Use a whip stitch or slip stitch to join them together on the edges.
Decorative Border
To add a finishing touch, work a round of single crochet around the entire bandana, ensuring to go into each stitch evenly.
Scalloped Edging
For a decorative edge, work 5 dc in the same stitch, skip the next stitch, and sl st into the next, repeating this around the entire piece.
Crochet Ties
To create ties, chain 60 for each side and attach securely at the corners of the bandana.
Finishing the Bandana
Weave in all ends, ensuring a clean finish. Block the bandana if necessary to maintain its shape.
Bandana Construction and Assembly
The construction begins with the granny squares, which are joined together to form the body of the bandana. Attention should be paid to keep the squares aligned neatly. After assembling, the decorative border is added around the edges, followed by creating ties that can be adjusted to fit comfortably behind the head. Lastly, weaving in ends is crucial for a tidy finish.
Crochet Bandana Edging and Finishing Details
Complete your bandana by incorporating a scalloped border and making sure all edges are evenly lined. This not only enhances the beauty of the designs but also adds that finishing touch that elevates your project. Block your finished piece lightly to set the shape and prevent any curling.
How to Wear and Style Your Crochet Bandana
Here are some chic styling ideas for your new crochet bandana:
- Wear it as a classic headscarf to keep hair tidy on windy days.
- Pair it with a boho-inspired outfit for a casual look.
- Use it as a summer hair accessory that adds flair to any ensemble.
- Create a laid-back everyday accessory for running errands.
- It makes a thoughtful handmade gift for a friend or family member.
Tips for a Better Result
- Keep a consistent tension while crocheting to ensure even stitches.
- Maintain the triangle symmetry for a professional look.
- Use stitch markers to mark rounds or rows when necessary.
- Plan color changes thoughtfully for a more vibrant appearance.
Crochet Bandana Customization Ideas
Feel free to explore various customization options, including:
- Experimenting with different yarn colors to reflect your personal style.
- Adjusting the length of the ties for your comfort.
- Adding contrasting borders for a more varied aesthetic.
- Choosing decorative edgings or embellishments to make the bandana uniquely yours.
Common Problems and Troubleshooting
- If your triangle shape is uneven, revisit your increases to ensure consistency.
- Ensure stitch counts match the pattern to avoid any sizing issues.
- If edges are curling, a gentle block might help flatten them.
- Check that granny squares are aligned and joined securely.
Care and Maintenance
To maintain your handmade crochet bandana, follow the yarn manufacturer’s care instructions. Generally, hand washing in cold water and laying flat to dry is recommended to preserve the integrity of your stitches.
Frequently Asked Questions
-
Is this crochet bandana pattern beginner-friendly?
Yes! This pattern is designed with beginners in mind, making it a great starter project. -
What yarn is best for a crochet bandana?
A cotton or acrylic blend yarn works well for durably and comfort. -
How long does it take to crochet a bandana?
Approximately 3-5 hours depending on your crocheting speed. -
Can I make this crochet bandana larger or smaller?
Yes, adjust the number of granny squares for larger sizes or make fewer for a smaller fit. -
How do I keep the triangular shape even?
Regular practice with increasing stitches will help maintain symmetry. -
Can I use different yarn colors?
Absolutely! Feel free to use multiple colors to personalize your bandana. -
How do I make the crochet bandana ties?
Simply chain your desired length for ties and securely attach to the bandana. -
Can I wear this bandana in summer?
Yes, it’s perfect for summer styling and can help keep your hair in place.
Conclusion
This Granny Crochet Bandana is not just a stylish accessory but also a testament to the joys of crochet. By following this easy pattern, you’ll create a functional piece that enhances any summer outfit. We encourage you to give this fun and rewarding project a try!
SEO TITLE: Easy Granny Crochet Bandana Pattern & Tutorial
META DESCRIPTION: Make an adorable summer-ready Granny Crochet Bandana with this easy pattern and tutorial! Perfect for beginners and stylish hair accessory lovers.
URL SLUG: granny-crochet-bandana-pattern
PRIMARY KEYWORD: granny crochet bandana
SECONDARY KEYWORDS: free crochet bandana pattern, easy crochet bandana, crochet headscarf pattern, summer crochet bandana
IMAGE 1 ALT TEXT: Completed granny crochet bandana in bright summer colors
IMAGE 2 ALT TEXT: Close-up of crochet granny square motif used in the bandana
Leave a Reply